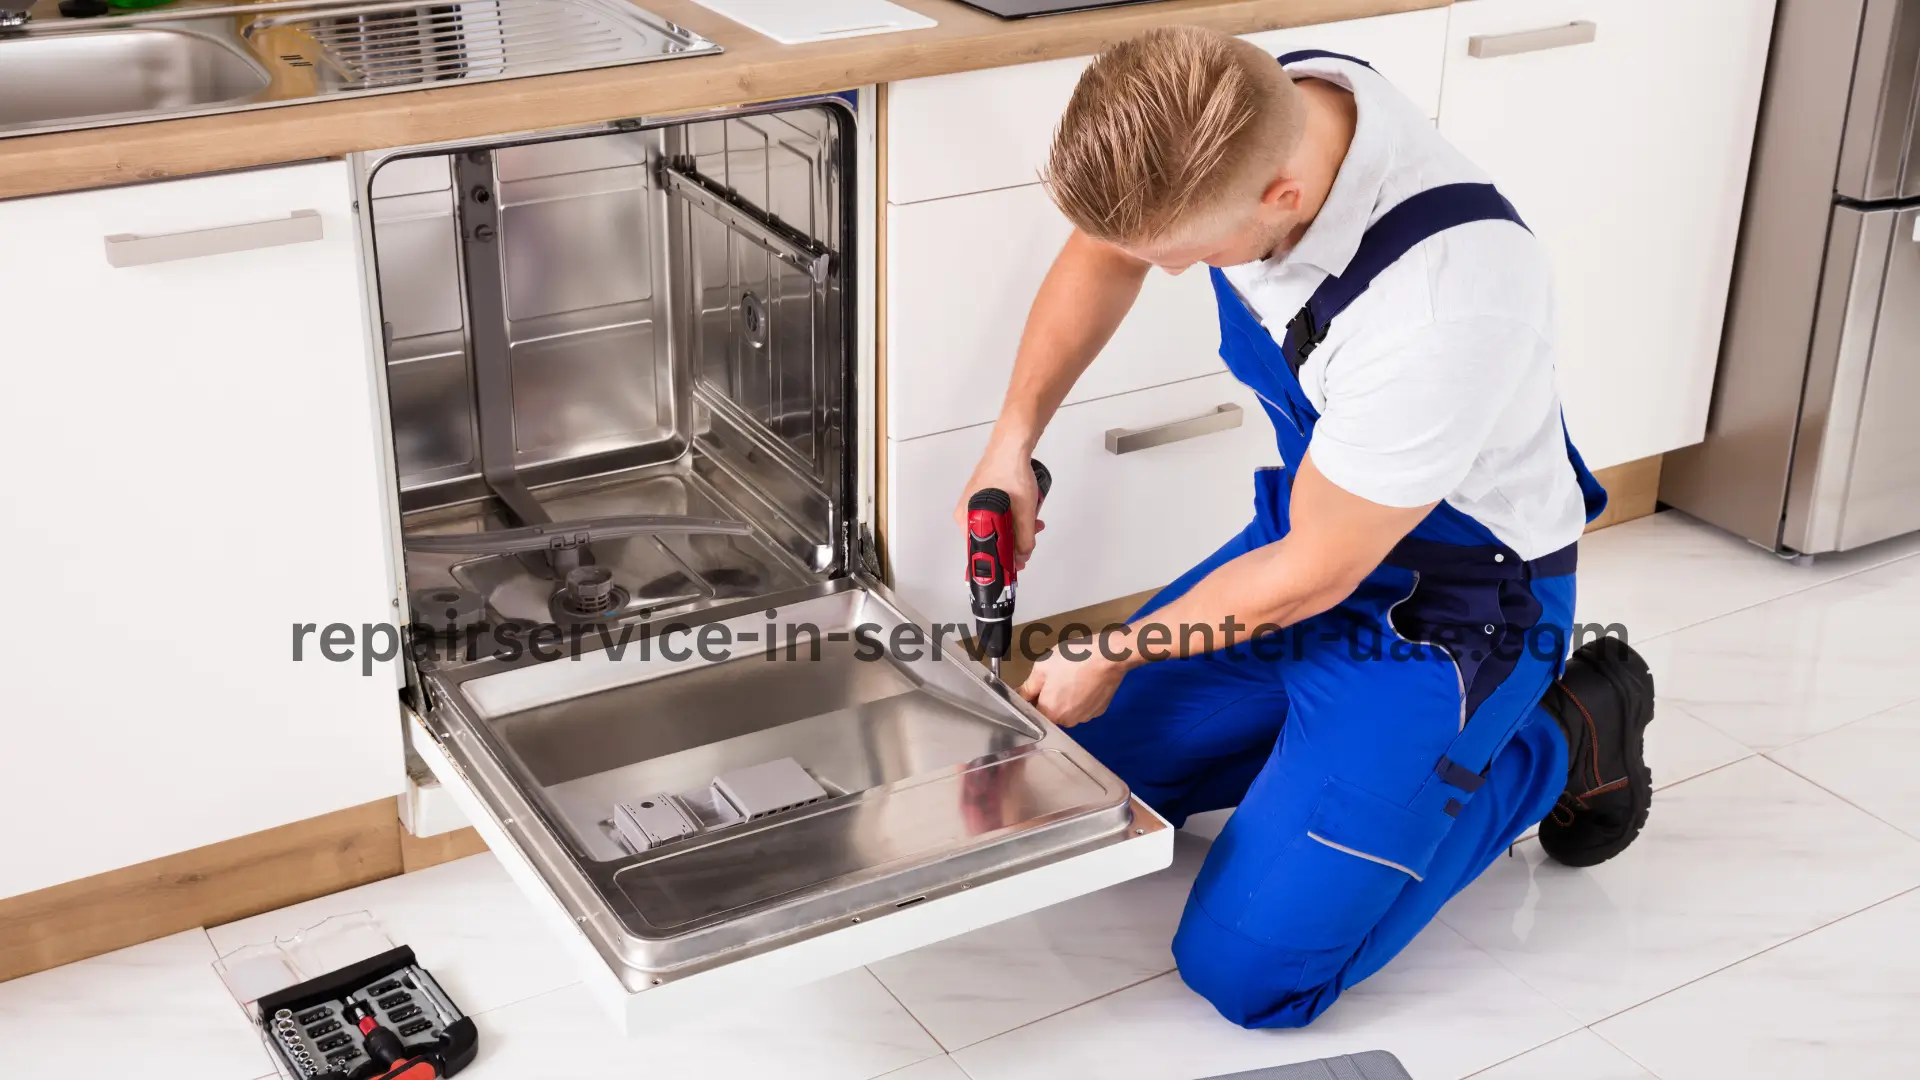
Leaking Dishwasher

The Importance of Regular Dishwasher Maintenance

A dishwasher is one of the most essential appliances in any modern kitchen. It saves time, energy, and the hassle of hand-washing dishes. However, like any other appliance, your dishwasher requires regular maintenance to keep it running smoothly. Neglecting this maintenance can lead to a host of problems, from inefficient cleaning to expensive repairs. In this post, we’ll explore why regular dishwasher maintenance is crucial and how it can save you time, money, and stress in the long run.

Why Dishwasher Maintenance Should Be a Top Priority

Regular dishwasher maintenance might not be the first thing on your to-do list, but it’s crucial for several reasons. First and foremost, a well-maintained dishwasher operates more efficiently. When all parts are clean and in good condition, your dishwasher uses less energy and water, making it more environmentally friendly and cost-effective. Secondly, regular maintenance can extend the lifespan of your dishwasher, sparing you the expense of an early replacement.

Beyond cost savings, keeping your dishwasher in good shape ensures that your dishes are actually getting clean. Over time, food particles, grease, and soap scum can build up in your dishwasher’s filter, spray arms, and drain. This buildup can reduce the efficiency of your dishwasher, leading to dirty dishes and unpleasant odors. Regular maintenance helps prevent these issues, ensuring that your dishes come out sparkling clean every time.

Moreover, regular dishwasher maintenance can prevent unexpected breakdowns. Appliances tend to fail at the most inconvenient times, and a broken dishwasher can disrupt your daily routine. By keeping up with maintenance, you can catch potential issues early before they become major problems. This proactive approach can save you from costly repairs and the hassle of a malfunctioning appliance.

If you’re unsure about how to maintain your dishwasher or need professional help, don’t hesitate to contact us at +971545356777. Our experts can provide thorough inspections and maintenance services to keep your dishwasher running like new.

Common Issues Caused by Poor Dishwasher Maintenance

When regular Dishwasher Maintenance is neglected, various issues can arise, some of which might not be immediately apparent. One common problem is poor cleaning performance. If you’ve noticed that your dishes aren’t coming out as clean as they used to, it could be due to clogged spray arms or a dirty filter. These components can become blocked by food particles and mineral deposits, reducing water flow and cleaning efficiency.

Another issue linked to poor dishwasher maintenance is the growth of mold and mildew. The warm, moist environment inside a dishwasher is ideal for these unwanted guests. If your dishwasher isn’t cleaned regularly, mold and mildew can build up, not only affecting the cleanliness of your dishes but also posing health risks. Regularly cleaning the door seals and running an empty cycle with vinegar can help prevent this problem.

Water leaks are another common consequence of neglected maintenance. Over time, seals and hoses can wear out, leading to leaks that can cause significant damage to your kitchen floors and cabinets. By regularly inspecting these parts and replacing them as needed, you can avoid the costly repairs that come with water damage.

In addition to these problems, a poorly maintained dishwasher can become noisy. If you notice unusual sounds during the wash cycle, it could be due to loose or worn-out parts. Regular maintenance can help identify and fix these issues before they escalate into more significant problems.

Lastly, a dishwasher that hasn’t been maintained properly can develop unpleasant odors. These odors are usually caused by food particles trapped in the filter or drain, leading to bacterial growth. Regularly cleaning these areas can help eliminate odors and keep your dishwasher smelling fresh.

Don’t let these common issues disrupt your kitchen routine. Regular dishwasher maintenance can prevent these problems and keep your appliance running smoothly. If you need assistance, our team is just a call away at +971545356777.

How to Perform Regular Dishwasher Maintenance

Maintaining your dishwasher doesn’t have to be a daunting task. With a few simple steps, you can keep your dishwasher in top condition and avoid many of the issues we’ve discussed. Here’s a step-by-step guide to performing regular dishwasher maintenance:

  1. Clean the Filter:

The filter is one of the most critical components of your dishwasher. It catches food particles and prevents them from clogging the drain. To clean it, remove the bottom rack and locate the filter, usually at the bottom of the dishwasher. Take it out and rinse it under running water to remove any debris. For stubborn buildup, use a soft brush and mild detergent.

  1. Check the Spray Arms:

The spray arms are responsible for distributing water throughout the dishwasher. Over time, the small holes in the spray arms can become clogged with food particles and mineral deposits. To clean them, remove the spray arms and rinse them under water. You can use a toothpick or small brush to clear any blockages in the holes.

  1. Wipe Down the Door Seals:

The rubber seals around the door can collect grime and mold if not cleaned regularly. Wipe them down with a damp cloth and mild detergent to keep them clean and prevent mold growth.

  1. Run a Vinegar Cycle:

Running an empty cycle with vinegar is an excellent way to clean the interior of your dishwasher. Place a cup of white vinegar in a dishwasher-safe container on the top rack and run a hot water cycle. The vinegar will help dissolve grease, remove odors, and break down any mineral deposits.

  1. Inspect Hoses and Seals:

Regularly check the hoses and seals for any signs of wear or damage. Replace them if necessary to prevent leaks.

  1. Clean the Drain:

The drain can become clogged with food particles, leading to poor drainage and unpleasant odors. Remove any visible debris from the drain area and clean it with a brush or cloth.

  1. Use the Right Detergent:

Always use a dishwasher detergent that’s designed for your machine. Using the wrong detergent can cause excess suds, which can lead to poor cleaning performance and potential damage to your dishwasher.

By following these simple steps, you can keep your dishwasher in excellent condition and avoid many common problems. Regular maintenance doesn’t take much time, but it can make a significant difference in the performance and longevity of your appliance.

For those who prefer professional help, our team at +971545356777 is here to assist. We offer comprehensive maintenance services to ensure your Dishwasher Maintenance remains in peak condition.

The Cost-Effectiveness of Regular Dishwasher Maintenance

One of the most compelling reasons to prioritize dishwasher maintenance is its cost-effectiveness. While it might seem like an additional chore, regular maintenance can save you money in the long run. How? By preventing expensive repairs and prolonging the lifespan of your appliance.

When you consider the cost of replacing a dishwasher, regular maintenance is a small price to pay. A new dishwasher can set you back several hundred dollars, not to mention the installation costs. On the other hand, the expenses associated with Dishwasher Maintenance are minimal. By investing a little time and money in upkeep, you can delay the need for a new appliance and enjoy many more years of reliable service from your current dishwasher.

Moreover, a well-maintained dishwasher operates more efficiently, which can lower your utility bills. When all parts are functioning correctly, your dishwasher uses less water and energy to clean your dishes. This efficiency not only benefits the environment but also reduces your monthly expenses.

In addition to saving on utility bills, regular Dishwasher Maintenance can prevent costly repairs. Catching small issues early, such as a worn-out seal or a clogged spray arm, can prevent them from developing into more significant problems that require expensive repairs. For example, a leaking hose might seem like a minor issue, but if left unchecked, it can lead to water damage that could cost hundreds of dollars to fix.

Furthermore, maintaining your dishwasher can enhance its resale value. If you ever decide to sell your home, having a well-maintained dishwasher can be a selling point. Potential buyers are more likely to pay a premium for a home with appliances that are in good working condition.

In summary, the cost-effectiveness of regular dishwasher maintenance cannot be overstated. It’s an investment that pays off in multiple ways, from reducing repair costs to extending the life of your appliance. If you’re unsure how to perform maintenance or simply don’t have the time, our team is ready to help. Give us a call at +971545356777 to schedule a service.

When to Call a Professional for Dishwasher Maintenance

While regular maintenance can be done by most homeowners, there are times when it’s best to call in a professional. Some issues require specialized tools and expertise that go beyond basic maintenance. Here’s when you should consider getting professional help:

  1. Persistent Leaks: If your dishwasher is leaking and you’ve checked the seals and hoses, it’s time to call a professional. Leaks can be caused by more serious issues, such as a faulty pump or a cracked tub, which require expert attention.
  2. Strange Noises: Unusual noises during the wash cycle, such as grinding, rattling, or buzzing, can indicate a problem with the motor, pump, or other internal components. These issues should be diagnosed and repaired by a professional to avoid further damage.
  3. Poor Cleaning Performance: If your dishes aren’t getting clean despite your best efforts at maintenance, there could be a deeper issue. Problems with the water inlet valve, heating element, or detergent dispenser might be to blame, and these require professional repair.
  4. Electrical Issues: If your dishwasher is tripping the circuit breaker or showing signs of electrical problems, such as flickering lights or failure to start, it’s crucial to call a professional. Electrical issues can be dangerous and should only be handled by someone with the proper training and tools.
  5. Bad Odors That Persist: While cleaning the filter and running a vinegar cycle can usually eliminate odors, persistent bad smells might indicate a problem with the drain or a buildup of mold in hard-to-reach areas. A professional can thoroughly clean and disinfect your dishwasher to get rid of these odors.

At the end of the day, your Dishwasher Maintenance is about striking a balance between DIY tasks and knowing when to call in the pros. If you need expert assistance, our team is ready to help. Contact us at +971545356777 to schedule a service appointment.

Read More
Leaking Dishwasher

When to Call a Professional for Dishwasher Repairs: A Complete Guide

A dishwasher is a vital part of any modern kitchen, making the job of cleaning dishes much easier and saving you time. But like any other home appliance, dishwashers can break down or show signs of wear and tear over time. When this happens, it can be tempting to attempt DIY repairs. However, there are certain situations where calling in a professional for dishwasher repairs is a must. In this guide, we’ll explore when it’s time to put down the tools and pick up the phone for professional help. If you’re in need of assistance, don’t hesitate to call +971545356777 for reliable dishwasher repairs.

1. Persistent Leaks: A Common Sign for Dishwasher Repairs

If you notice puddles of water forming around your dishwasher, it’s a clear indication that something is wrong. Leaks can lead to water damage in your kitchen, so addressing them quickly is essential. Some leaks may seem minor at first, but they could signal more significant issues within the machine.

Common Causes of Dishwasher Leaks

  • Faulty Door Seals: Over time, the rubber gasket that seals your dishwasher door can wear out. When this happens, water can seep through the door during cycles. This is a relatively straightforward fix, but if you’re not experienced with appliance repairs, it’s best to let a professional handle it.
  • Damaged Hoses: Dishwashers use hoses to bring in clean water and drain dirty water. If one of these hoses has a crack or is loose, it can cause leaking. Replacing or repairing a damaged hose might sound simple, but a professional will know exactly how to address it without causing further damage.
  • Broken Pump: The dishwasher pump is responsible for circulating water through the system. If it’s broken or malfunctioning, water may leak underneath the unit. Diagnosing pump issues can be tricky, so this is a situation where dishwasher repairs from a trained technician are essential.

Water leaks can escalate into expensive repairs if not handled properly. Trying to fix the problem yourself may lead to accidental damage, causing further complications. If you’ve tried tightening hoses or cleaning door seals and the problem persists, it’s time to call a professional for dishwasher repairs. Don’t wait until water damage spreads to other parts of your kitchen. Call +971545356777 for expert help today.

2. Dishwasher Not Draining Properly: A Red Flag

When your dishwasher finishes a cycle and there’s still standing water in the bottom, this is a sign that something is wrong. Poor drainage can result in dirty dishes and unpleasant odors. While there are a few things you can check on your own, like removing food debris from the drain, persistent drainage problems require professional dishwasher repairs.

What Causes Drainage Issues?

  • Clogged Drain Line: The most common reason for a dishwasher not draining is a clogged drain line. This line can get blocked by food particles, soap scum, or even small pieces of broken dishes. Cleaning the drain line is often more complex than it sounds. A professional will have the right tools to remove the blockage without damaging your dishwasher.
  • Faulty Drain Pump: The drain pump pushes water out of your dishwasher at the end of the cycle. If this part malfunctions, water won’t drain properly. Replacing a drain pump requires disassembling parts of the machine, which is best left to someone with experience in dishwasher repairs.
  • Garbage Disposal Issues: In some setups, the dishwasher drains through the garbage disposal. If the disposal is clogged or not working correctly, it can prevent the dishwasher from draining. Diagnosing this issue requires knowledge of both appliances, making professional help necessary.

If your dishwasher isn’t draining and you’ve tried all the DIY solutions without success, it’s time to bring in a professional. Ignoring the problem could lead to mold and mildew buildup, making it even more expensive to repair in the future. Save yourself the hassle by calling +971545356777 for expert dishwasher repairs.

3. Unusual Noises: When Dishwasher Repairs Are Urgent

Dishwashers are designed to run relatively quietly, so when you start hearing strange noises during a cycle, something is likely wrong. These sounds could be a signal that components are wearing out or becoming misaligned. While some noise issues can be minor, others can indicate more serious problems that require immediate dishwasher repairs.

Common Noises and What They Mean

  • Grinding Sounds: If you hear a grinding noise, it could mean the pump motor or another internal component is struggling. This might happen if a hard object like a piece of glass is stuck in the pump. A professional can disassemble the pump safely to remove the object and check for any lasting damage.
  • Thumping or Banging: Loud thumping sounds could indicate that spray arms or other parts inside the dishwasher are loose or misaligned. This can happen if dishes have been loaded incorrectly or if a component has shifted over time. Fixing this often requires realigning parts, a job that a trained professional can do quickly.
  • Humming or Buzzing: A consistent buzzing or humming sound may point to electrical issues, such as a failing motor or a problem with the solenoid. Electrical repairs should never be attempted by someone who isn’t familiar with the inner workings of dishwashers. Call a professional to avoid the risk of electric shock or further damage to your appliance.

Unusual noises should never be ignored. Catching a problem early could save you from needing a complete dishwasher replacement down the line. If your dishwasher starts making odd sounds, it’s time to call +971545356777 for expert diagnosis and repairs.

4. Poor Cleaning Performance: Time for Professional Dishwasher Repairs

Is your dishwasher leaving behind dirty dishes even after a full cycle? Poor cleaning performance can be frustrating and usually points to an internal issue. While regular maintenance, such as cleaning the filter and ensuring proper loading, can help, there are times when these steps aren’t enough. In those cases, professional dishwasher repairs are your best option.

What Could Be Causing Poor Cleaning?

  • Clogged Spray Arms: The spray arms inside your dishwasher are responsible for distributing water to all areas of the appliance. If they become clogged with food particles or mineral deposits, the water won’t reach your dishes, leaving them dirty. A professional can remove and clean these parts properly, ensuring your dishwasher operates efficiently.
  • Malfunctioning Water Inlet Valve: The water inlet valve controls the amount of water entering the dishwasher. If it’s malfunctioning, your appliance may not be getting enough water to clean the dishes effectively. Replacing a faulty inlet valve is a job that requires expertise, making professional dishwasher repairs necessary.
  • Low Water Temperature: Sometimes, poor cleaning can be due to low water temperature. Dishwashers typically need hot water (around 120°F) to break down grease and food residue effectively. If your dishwasher isn’t heating the water properly, there could be an issue with the heating element, which requires professional attention.

Consistently poor cleaning is more than just an inconvenience. It could be a sign of deeper mechanical problems. Rather than continue to rewash dishes, it’s best to call in an expert. Contact +971545356777 for reliable dishwasher repairs and get your appliance back to optimal performance.

5. Error Codes: When DIY Troubleshooting Fails

Many modern dishwashers come equipped with digital displays that show error codes when something goes wrong. While some of these codes are straightforward and can be resolved with a reset or simple adjustment, others may point to more complex issues. If your dishwasher keeps flashing error codes that you can’t fix, it’s time to call a professional for dishwasher repairs.

Common Dishwasher Error Codes

  • E24 or F24 (Drain Error): This code indicates a drainage issue, which can be caused by a clogged filter, blocked hose, or a problem with the drain pump. If cleaning the filter and checking the hose doesn’t resolve the issue, you’ll need a professional to take a closer look.
  • E15 or F15 (Water Leakage): If your dishwasher is showing this code, it likely means there’s a leak or overflow issue. This can be caused by a damaged door seal, faulty hoses, or a cracked tub. Professional repair is essential to prevent water damage to your home.
  • E09 or F09 (Heating Element Failure): This code indicates that the heating element in your dishwasher isn’t working correctly. Since the heating element is responsible for drying your dishes and maintaining the water temperature, fixing or replacing it requires professional expertise.

Error codes can give you a clue about what’s wrong with your dishwasher, but they don’t always tell the whole story. If your appliance is displaying persistent error codes, don’t waste time trying to figure it out on your own. Call +971545356777 for professional dishwasher repairs and let an expert solve the problem.

Conclusion

Knowing when to call a professional for dishwasher repairs can save you time, money, and the headache of dealing with a broken appliance. Whether it’s a persistent leak, strange noises, poor cleaning performance, or confusing error codes, professional help ensures the problem is fixed correctly and safely. If your dishwasher is acting up, don’t wait until the issue worsens—call +971545356777 today and schedule your expert dishwasher repairs.

Read More
Leaking Dishwasher

Step-by-Step Guide to Fixing a Leaking Dishwasher

A leaking dishwasher is one of the most common and frustrating issues many homeowners face. It can be tricky to pinpoint the exact cause, and leaving it unattended could lead to bigger problems like water damage, mold growth, or a costly repair bill. But don’t worry! You don’t always need a professional to solve the problem. In this detailed guide, we’ll take you through the step-by-step process of fixing a leaking dishwasher, ensuring you can get your appliance back in working order.

If you find yourself stuck or unable to fix the issue, remember you can always reach out for professional help at +971545356777.

Why Is My Dishwasher Leaking? Common Causes

Before diving into the step-by-step guide to fixing your leaking dishwasher, it’s essential to understand why it’s leaking in the first place. A leaking dishwasher can be caused by several issues, many of which are quite simple to fix if caught early.

  1. Damaged Door Gasket: The door gasket is the rubber seal around the door that keeps water from leaking out. Over time, this gasket can wear out, crack, or become brittle, which results in water leaking from the sides.
  2. Clogged Drain: If your dishwasher’s drain is clogged, it can cause water to pool at the bottom and eventually leak. Food particles, grease, and soap scum can all contribute to a blocked drain.
  3. Leaky Hoses: The hoses connecting your dishwasher to the water supply or drain can loosen or wear out, causing water to leak.
  4. Faulty Float Switch: The float switch controls the water level inside the dishwasher. If it’s malfunctioning, the dishwasher may overfill, leading to a leak.
  5. Cracked Tub: Though less common, a crack in the dishwasher tub can cause water to leak, especially in older models.

Understanding these common issues can help guide your troubleshooting process. However, if you feel overwhelmed, feel free to give us a call at +971545356777.

Tools You’ll Need to Fix a Leaking Dishwasher

Before starting, gather all the necessary tools to make the repair process as smooth as possible. Fortunately, most fixes don’t require anything too specialized. Here’s a list of the basic tools and materials you’ll need:

  • Screwdrivers (Phillips and flathead)
  • Pliers
  • Bucket
  • Dishwasher-safe cleaner
  • New gasket or hose (if needed)
  • Towels or rags
  • Multimeter (for electrical testing)

Having these tools on hand will make fixing your leaking dishwasher a quicker and more efficient task.

Remember, not every leaking dishwasher requires all these tools, but having them close by ensures you won’t have to pause mid-repair to search for something. If at any point, this seems too complex, don’t hesitate to seek assistance by calling +971545356777.

Step 1: Check the Door Seal (Gasket)

The first and most straightforward thing to check when dealing with a leaking dishwasher is the door seal, also known as the gasket. A worn or damaged door gasket is one of the most common reasons for a dishwasher leak.

How to Check the Door Seal:

  1. Turn off the power: Always start by turning off the power supply to your dishwasher to ensure safety.
  2. Inspect the door gasket: Open the dishwasher door and carefully examine the gasket for any signs of cracks, breaks, or wear. Over time, the rubber can become brittle and lose its flexibility.
  3. Clean the gasket: Sometimes, grime buildup along the gasket can prevent the door from sealing properly. Use a dishwasher-safe cleaner or warm soapy water to clean it.
  4. Replace if necessary: If the gasket is damaged, you’ll need to replace it. You can find replacement gaskets at most hardware stores. Simply remove the old gasket, clean the area, and press the new one into place. Make sure it’s seated properly so there are no gaps.

Taking care of the gasket could solve your leaking dishwasher problem quickly. If the leak persists, move on to the next steps or reach out for help at +971545356777.

Step 2: Inspect the Water Inlet Valve

The next thing to check if your dishwasher is still leaking is the water inlet valve. This valve controls the amount of water that enters your dishwasher, and if it’s damaged or malfunctioning, it may cause your dishwasher to overfill and leak.

Steps to Inspect the Water Inlet Valve:

  1. Locate the valve: You can typically find the water inlet valve near the bottom of the dishwasher, behind the access panel. You’ll need to remove this panel with a screwdriver.
  2. Check for leaks: Look for any visible leaks around the valve or the connected hoses.
  3. Test the valve: If you suspect the valve isn’t functioning correctly, you can test it using a multimeter. Set the multimeter to the ohms setting and test for continuity. If the reading is out of the recommended range (check your dishwasher’s manual), you’ll need to replace the valve.

If replacing the water inlet valve seems too complex or you need further assistance, don’t hesitate to contact us at +971545356777.

Step 3: Clear the Drain and Filter

A clogged drain or filter is another common reason for a leaking dishwasher. When water can’t drain properly, it can pool at the bottom of the appliance and eventually leak out.

How to Clear the Drain and Filter:

  1. Turn off the power: Safety first! Ensure your dishwasher is disconnected from the power supply.
  2. Locate the drain: The drain is typically located at the bottom of your dishwasher. You’ll need to remove the bottom rack to access it.
  3. Clean the filter: The dishwasher filter prevents food particles from clogging the drain, but over time, it can get dirty and blocked. Remove the filter and clean it thoroughly with warm water and dish soap.
  4. Check the drain: After cleaning the filter, inspect the drain for any clogs or obstructions. Use a small brush or wire to remove any debris.

Regularly cleaning the drain and filter can prevent future leaks. If this doesn’t resolve the issue, it might be time to call in the experts at +971545356777.

Step 4: Examine the Hoses

Your dishwasher relies on hoses to move water in and out, and a loose, cracked, or damaged hose could easily be the source of a leak.

How to Examine and Fix the Hoses:

  1. Access the hoses: The hoses are located behind or underneath the dishwasher. You may need to pull the dishwasher out from its slot to inspect them.
  2. Inspect for damage: Look for any visible cracks, leaks, or signs of wear in the hoses connecting the dishwasher to the water supply and drain.
  3. Tighten connections: Sometimes, the hose connections can become loose over time. Check all connections and tighten them as needed.
  4. Replace damaged hoses: If a hose is damaged, you’ll need to replace it. Most replacement hoses can be found at your local hardware store.

Properly maintained hoses are key to a leak-free dishwasher. If this step seems a bit too challenging, don’t hesitate to contact +971545356777 for professional assistance.

Step 5: Inspect the Float Switch

The float switch plays a crucial role in preventing your dishwasher from overfilling with water. If it’s malfunctioning, water levels can rise too high, causing leaks.

Steps to Inspect the Float Switch:

  1. Locate the float: The float is a small device inside your dishwasher, typically found near the bottom.
  2. Check for obstructions: Make sure nothing is blocking the float from moving freely up and down.
  3. Test the switch: Gently lift the float and listen for a clicking sound. If you don’t hear it, the float switch may need to be replaced.

A faulty float switch can lead to overfilling and leaks. If you suspect this is the issue, call +971545356777 for expert advice or replacement.

When to Call a Professional

While many dishwasher leaks can be fixed with the steps outlined in this guide, some problems require the expertise of a professional. If you’ve followed each step and the leak persists, or if the repairs seem too complicated, it’s time to bring in the pros. Water damage from a leaking dishwasher can quickly escalate, so don’t delay.

Our team is here to help. Call us at +971545356777 for quick, reliable service.

Final Thoughts: Preventing Future Leaks

Fixing a leaking dishwasher can be a straightforward process if you know what to look for. However, the best way to avoid leaks in the future is regular maintenance. Clean the filter, check the hoses, and inspect the door gasket regularly. Keeping your dishwasher in good condition will not only prevent leaks but also extend its lifespan.

Read More
Dishwasher Problems

How to Diagnose Common Dishwasher Problems: A Step-by-Step Guide

Dishwashers are a major convenience in modern kitchens, saving time and effort. But what happens when they stop working properly? You don’t have to be a professional technician to identify common dishwasher problems. Understanding the issues can save you a lot of money and stress. This blog will guide you through the most common problems and how you can diagnose them at home before calling a professional.

For immediate help, feel free to call us at +971545356777.

1. Dishwasher Not Draining Properly

One of the most common dishwasher problems is poor drainage. You open the door only to find standing water at the bottom of the machine. This can be frustrating, but don’t panic! There are a few potential culprits.

Possible Causes:

  • Clogged Filter: The dishwasher’s filter, located at the bottom of the machine, may be clogged with food debris, soap scum, or grease. When this filter gets blocked, it can prevent proper drainage.
  • Blocked Drain Hose: The drain hose might be kinked or blocked by debris. This hose connects your Dishwasher Problems to the kitchen sink drain or garbage disposal. If it’s obstructed, water won’t drain out properly.
  • Garbage Disposal Clogs: If you’ve recently installed or used a garbage disposal, there might be an air gap issue, or the disposal itself might be clogged. This can back up into the dishwasher and block drainage.
  • Faulty Drain Pump: In some cases, the dishwasher’s drain pump could be broken. This can stop the water from pumping out of the machine.

What to Do:

  • Check and Clean the Filter: Remove the filter from the bottom of the dishwasher and clean it thoroughly. If it’s clogged, this might solve your Dishwasher Problems instantly.
  • Inspect the Drain Hose: Check if the hose is twisted or blocked. Straighten any kinks and clean out any obstructions.
  • Run the Garbage Disposal: Clear out any potential blockages in your garbage disposal by running it for a minute.
  • Call a Technician: If none of these steps work, you may have a faulty drain pump. Contact a professional at +971545356777 for assistance.

2. Dishes Aren’t Getting Clean

Have you ever opened your dishwasher expecting sparkling dishes, only to find leftover food or residue? This can be one of the more frustrating dishwasher problems, and it’s often caused by several factors.

Possible Causes:

  • Dirty Spray Arms: The spray arms in your dishwasher are responsible for spraying water and detergent over your dishes. If they become clogged with debris or hard water deposits, they won’t be able to do their job properly.
  • Incorrect Loading: Overloading the dishwasher or placing items incorrectly can block the spray arms and prevent water from reaching all the dishes.
  • Wrong Detergent or Hard Water: Using the wrong type of detergent or having hard water in your home can affect cleaning performance. Hard water leaves mineral deposits, while poor-quality detergent might not dissolve food properly.
  • Low Water Temperature: If your dishwasher isn’t using hot enough water, it won’t clean dishes thoroughly. The ideal temperature for dishwashers is between 120°F and 150°F.

What to Do:

  • Clean the Spray Arms: Remove the spray arms and soak them in vinegar or warm, soapy water to dissolve any build-up. Then, use a toothpick or small tool to unclog the holes.
  • Reorganize Your Dishes: Ensure you’re not overloading the machine. Place larger items on the bottom rack and make sure the spray arms can spin freely.
  • Use Quality Detergent: Switch to a high-quality detergent designed to solve your Dishwasher Problems and water type. If you have hard water, consider using a water softener.
  • Increase Water Temperature: Check the temperature of your home’s hot water heater and raise it if necessary. For persistent issues, give us a call at +971545356777.

3. Dishwasher Leaking Water

Another common dishwasher problem is leakage, which can cause significant damage to your kitchen floors. Fortunately, diagnosing a leak is fairly simple and can often be fixed quickly.

Possible Causes:

  • Worn Door Seal: The rubber gasket around the door seals the dishwasher shut. If this gasket is cracked or worn out, it can cause water to leak out.
  • Loose Connections: The water supply line and drain hose must be tightly connected. If either becomes loose, water will leak from the connection points.
  • Clogged Filter or Drain: If the dishwasher is not draining properly, water may overflow and leak out the bottom of the machine.
  • Overloading the Dishwasher: Loading too many dishes into the machine can cause water to splash out during the wash cycle.

What to Do:

  • Inspect and Replace the Door Seal: Look around the edge of the dishwasher door for cracks or wear in the rubber seal. If damaged, you can replace the seal yourself or call a professional for help.
  • Tighten the Connections: Check the water inlet and drain hose connections under your sink and behind the dishwasher to solve Dishwasher Problems. If they are loose, tighten them to prevent leaks.
  • Avoid Overloading the Machine: Be sure you’re not putting too many dishes into the dishwasher. Stick to the recommended capacity for optimal performance.
  • Call a Technician: If you’ve tried everything and water is still leaking, you might need professional assistance. Call +971545356777 to schedule a visit.

4. Dishwasher Won’t Start

When your dishwasher doesn’t start at all, it can be one of the more alarming dishwasher problems. Before you panic, check out these common reasons why this might happen.

Possible Causes:

  • Door Latch Issue: Your dishwasher won’t start unless the door is properly latched. If the latch is broken or not engaging, the machine won’t run.
  • Power Supply Problems: Ensure that the dishwasher is plugged in and that the outlet is working. Sometimes, a tripped circuit breaker can also prevent the dishwasher from starting.
  • Control Panel Malfunction: If the control panel or buttons aren’t functioning, the Dishwasher Problems. This could be a result of faulty wiring, moisture damage, or just wear and tear.
  • Timer or Motor Problems: In some cases, the motor or the timer may be faulty, preventing the dishwasher from starting its cycle.

What to Do:

  • Check the Door Latch: Ensure that the door is properly closed and latched. If the latch is damaged, you may need to replace it.
  • Inspect the Power Supply: Make sure the dishwasher is plugged in and check for any blown fuses or tripped breakers.
  • Reset the Control Panel: Try resetting the dishwasher’s control panel by unplugging the machine or turning off the breaker for a few minutes.
  • Call for Professional Help: If you suspect a motor or timer issue, it’s best to call a professional to diagnose and fix the problem. Contact us at +971545356777.

5. Strange Noises During Operation

Is your dishwasher making odd noises? Rattling, humming, or banging sounds are among the more puzzling dishwasher problems. These noises can point to mechanical issues or improper usage.

Possible Causes:

  • Loose Items in the Dishwasher: If utensils or dishes are not placed securely, they can rattle against each other, creating noise.
  • Clogged or Damaged Spray Arms: A clogged spray arm may hit dishes during operation, causing noise. Alternatively, it could be damaged and require replacement.
  • Faulty Motor or Pump: A worn-out motor or faulty pump may produce a grinding or humming noise as it struggles to operate.
  • Water Inlet Valve Issues: A defective water inlet valve may cause a loud humming or buzzing noise when water is being drawn into the dishwasher.

What to Do:

  • Rearrange Your Dishes: Ensure that all items are securely placed in the racks. Make sure utensils are not poking out of the utensil holder and hitting the spray arms.
  • Clean or Replace Spray Arms: If the spray arms are making contact with dishes, clean them or replace them if they are damaged.
  • Call a Technician for Noisy Motors: If you hear persistent grinding or humming sounds, you might have a motor or pump issue. Contact a technician at +971545356777 for a professional diagnosis.

Conclusion

Dishwasher problems are never fun, but with a little bit of knowledge, you can diagnose many common issues yourself. Whether your machine isn’t draining, not cleaning properly, leaking, or refusing to start, there are usually simple solutions. However, if the problem persists or you’re unsure of how to fix it, don’t hesitate to call a professional.

Need expert help? Give us a call at +971545356777, and we’ll have your dishwasher up and running in no time!

Read More
Tools for Dishwasher Repair

How to Replace a Faulty Dishwasher Motor

If you’ve noticed your dishwasher isn’t cleaning as efficiently, or it makes strange noises, you might be dealing with a faulty dishwasher motor. In this guide, we’ll walk you through how to diagnose, remove, and replace that motor to get your dishwasher back in working order. Replacing a faulty dishwasher motor might sound intimidating, but with a bit of patience and the right tools, you can tackle it yourself. Ready? Let’s dive in!

Call Now for Professional Help: +971545356777

Symptoms of a Faulty Dishwasher Motor

Before jumping into the replacement process, it’s essential to know if your dishwasher motor is truly faulty. Several signs can indicate that the motor is malfunctioning. Identifying these symptoms early can save you time and prevent further damage to your appliance.

1. Strange Noises Coming from the Dishwasher

If you hear grinding, humming, or squealing sounds from your dishwasher, it could be a sign of a faulty dishwasher motor. These noises might indicate that the motor’s bearings are worn out, which can hinder the motor from working correctly. Sometimes, the motor might struggle to run, causing these strange sounds.

2. Dishes Are Not Being Cleaned Properly

One of the clearest signs of a faulty dishwasher motor is poorly cleaned dishes. When the motor is malfunctioning, the water pressure decreases, which means that the dishes aren’t being cleaned as thoroughly as they should be. If you’re still finding residue or dirt on your plates after a full wash cycle, it’s worth checking the motor.

3. Dishwasher Fails to Drain

A faulty dishwasher motor can also prevent the dishwasher from draining properly. If water remains pooled at the bottom after a cycle, the motor may be to blame. A functional motor helps pump out the water during the draining process, and if it’s not doing its job, you’ll notice standing water in your machine.

4. Dishwasher Doesn’t Start

If your dishwasher isn’t starting at all, a faulty dishwasher motor could be the culprit. This often happens when the motor has completely burned out. If you’ve tried other troubleshooting steps like checking the power supply and control panel, and your dishwasher still won’t turn on, the motor may need replacement.

If you’re experiencing one or more of these issues, it’s time to consider replacing the faulty dishwasher motor.

Tools You’ll Need to Replace a Faulty Dishwasher Motor

Before diving into the repair process, gather all the tools you’ll need. This makes the job smoother and ensures you won’t need to pause halfway through. Here’s a list of essential tools required for replacing a faulty dishwasher motor:

  • Screwdriver set
  • Wrench
  • Needle-nose pliers
  • Towels or rags (for cleaning up spills)
  • Replacement dishwasher motor (ensure it’s compatible with your dishwasher model)
  • A small bucket (to catch any residual water)

While these tools should be enough for most dishwasher motor replacements, double-check your dishwasher’s manual for any model-specific tools you might need.

Need Help? Call: +971545356777

Step-by-Step Guide to Replace a Faulty Dishwasher Motor

Now that you know the signs of a faulty dishwasher motor and have the necessary tools, it’s time to get started. Follow these detailed steps to replace the motor in your dishwasher safely and efficiently.

1. Disconnect Power and Water Supply

Safety first! Before you start working on your dishwasher, always disconnect it from the power source. Either unplug the dishwasher from the wall or switch off the circuit breaker that controls the appliance. Next, turn off the water supply to prevent any unwanted leaks while working.

2. Remove the Dishwasher

In many cases, replacing a faulty dishwasher motor will require you to pull the dishwasher out from under the counter. Begin by unscrewing the mounting brackets that hold the dishwasher in place. Then, carefully pull the dishwasher out, ensuring you don’t damage any electrical cords or water hoses.

3. Locate the Motor

Once the dishwasher is free from the counter, tip it back slightly to access the underside, where the motor is typically located. The motor is usually found at the bottom of the appliance near the center. It will be connected to a pump assembly, which helps circulate and drain water during the cycle.

4. Disconnect the Faulty Dishwasher Motor

Using your screwdriver or wrench, begin by disconnecting the wires and bolts securing the motor. It’s crucial to be gentle here to avoid damaging other components. Take note of where each wire is connected so you can easily reassemble everything later. You might also find a few clamps or hose connections that need to be removed.

If there’s any water left in the hoses, have your bucket ready to catch the spills.

5. Install the New Dishwasher Motor

Now it’s time to install the replacement motor. Position the new motor in the same spot as the old one, making sure the connections line up properly. Secure it in place with the same bolts, screws, or clamps. Reconnect all the wires exactly as they were before.

Double-check all connections to ensure the motor is firmly attached and aligned with the pump.

Need Assistance? Contact Us: +971545356777

Testing and Final Steps After Replacing the Faulty Dishwasher Motor

With your new motor securely in place, you’re almost done. However, it’s crucial to follow these final steps to ensure everything is working correctly.

1. Reassemble the Dishwasher

Once the new motor is installed, it’s time to reassemble the dishwasher. Tip the appliance back upright and carefully slide it back into its original position under the counter. Reconnect the mounting brackets, ensuring it’s firmly in place. Be cautious not to pinch any wires or hoses as you push it back.

2. Restore Power and Water Supply

Turn the power and water supply back on. If you switched off the breaker, flip it back to the “on” position. For dishwashers plugged into an outlet, simply plug it back in.

3. Test the Dishwasher

Run a short wash cycle to ensure everything is functioning properly. Pay attention to the sounds the machine makes and check that the dishes are being cleaned thoroughly. Also, ensure that the dishwasher drains correctly and no water is left at the bottom.

If everything runs smoothly, congratulations! You’ve successfully replaced your faulty dishwasher motor.

However, if the dishwasher still isn’t functioning as expected, double-check the motor’s installation or consider consulting a professional technician. A small error in wiring or alignment can sometimes cause issues.

Need Expert Help? Call +971545356777

Why Regular Maintenance Prevents Faulty Dishwasher Motors

After going through the trouble of replacing a faulty dishwasher motor, it’s a good idea to take preventive measures to extend the life of your dishwasher’s new motor. Regular maintenance can prevent costly repairs and replacements down the road. Here are some tips to keep your dishwasher running smoothly:

1. Clean Filters Regularly

A clogged filter puts unnecessary strain on your motor. Ensure that you’re cleaning the filter at least once a month to maintain efficient water flow and reduce the risk of motor failure.

2. Use the Right Detergent

Not all detergents are created equal. Using a dishwasher-safe detergent that’s designed for your model can help reduce build-up and keep the motor running smoothly.

3. Avoid Overloading the Dishwasher

Overloading your dishwasher forces the motor to work harder, which can lead to premature wear and tear. Load the dishwasher according to the manufacturer’s guidelines, leaving space between dishes to allow proper water circulation.

4. Schedule Regular Service

Even if everything seems fine, scheduling a professional service for your dishwasher once a year can help catch potential issues before they become major problems. A technician can inspect your motor and other components to ensure they’re in top condition.

By following these tips, you’ll ensure that your new dishwasher motor serves you for years to come. However, if you run into any trouble, don’t hesitate to contact us for assistance.

For Professional Help: Call +971545356777

Read More
Tools for Dishwasher Repair

How to Replace a Dishwasher Heating Element: A Step-by-Step Guide

Is your dishwasher not heating the water properly? It could be a sign that your dishwasher heating element has malfunctioned. Replacing a dishwasher heating element might seem daunting at first, but with the right steps and guidance, you can handle it like a pro. In this guide, we’ll walk you through the process of replacing your dishwasher heating element to get your appliance running efficiently again.

Understanding the Importance of the Dishwasher Heating Element

Before jumping into the replacement process, it’s important to understand the role the dishwasher heating element plays. The dishwasher heating element is critical to your appliance’s performance. It heats the water to the right temperature for proper cleaning and sanitization of dishes. Additionally, it helps dry the dishes at the end of the cycle. Without a working heating element, your dishwasher may leave your dishes wet or unclean, affecting the appliance’s overall performance.

Dishwasher heating elements can wear out over time due to constant use or electrical issues. So, if your dishwasher isn’t getting hot enough, or your dishes aren’t drying at the end of the cycle, it’s time to consider replacing the heating element.

Signs That Your Dishwasher Heating Element Needs Replacement

Identifying when your dishwasher heating element is faulty is the first step. So, how do you know if it’s time to replace it? Here are some common signs:

  1. Dishes Are Cold: After a wash cycle, your dishes should be warm. If they’re coming out cold or lukewarm, it could mean the heating element isn’t functioning correctly.
  2. Dishes Stay Wet: The heating element not only heats the water but also helps to dry the dishes at the end of the cycle. If your dishes remain wet, even after a drying cycle, the dishwasher heating element might be damaged.
  3. Inconsistent Water Temperatures: You may notice that sometimes the water in the dishwasher is hot, and other times it’s not. This inconsistency is a clear sign of a faulty heating element.
  4. Error Codes: Some modern dishwashers are smart enough to tell you when something’s wrong. If your machine shows an error code related to heating, this is a sure indication that you need to check the dishwasher heating element.

Replacing a dishwasher heating element isn’t as complex as you might think. Let’s take a closer look at how you can do it yourself.

Tools You Will Need to Replace the Dishwasher Heating Element

Before diving into the replacement process, it’s essential to gather all the tools you’ll need to get the job done efficiently. Here’s what you’ll need:

  • New Dishwasher Heating Element: Ensure it’s compatible with your dishwasher model.
  • Screwdriver: You’ll need both a flathead and a Phillips screwdriver.
  • Wrench or Pliers: These will help you loosen and tighten the necessary components.
  • Towel: To mop up any excess water or spills during the replacement process.
  • Work Gloves: For safety, as you’ll be handling sharp objects and wires.

Having these tools ready will ensure the replacement process goes smoothly. Now, let’s get into the actual steps for replacing your dishwasher heating element.

Step-by-Step Guide to Replacing the Dishwasher Heating Element

Now that you understand the importance of the heating element and have all your tools handy, let’s dive into the process of replacing your dishwasher heating element. Don’t worry, by following these steps closely, you’ll have your dishwasher back to working efficiently in no time.

1. Disconnect the Power

Before starting any repairs, ensure that your dishwasher is disconnected from the power source. Unplug the appliance from the wall socket or turn off the power at the circuit breaker. Safety is paramount when dealing with electrical appliances, so double-check that the dishwasher has no electrical power running to it before proceeding.

2. Turn Off the Water Supply

Next, turn off the water supply connected to the dishwasher. This prevents any unexpected leaks or spills while you’re working on the appliance. You can typically find the water valve under the sink or near the dishwasher. Turn it clockwise to shut off the water.

3. Access the Bottom Panel

To access the heating element, you’ll need to remove the lower panel of your dishwasher. Grab your screwdriver and remove the screws holding the panel in place. Once the screws are out, carefully remove the panel and set it aside.

4. Locate the Dishwasher Heating Element

Once you’ve removed the panel, you’ll be able to see the heating element. It’s usually located at the bottom of the dishwasher tub. It resembles a metal rod or coil. Inspect the heating element for any visible damage such as burns or breaks, which could explain why it stopped working.

5. Disconnect the Wires

Before removing the dishwasher heating element, disconnect the wires attached to it. These wires provide the electrical power that heats the element, so be cautious when handling them. Take note of where each wire is connected, or even take a picture to make reattachment easier.

6. Remove the Old Heating Element

Once the wires are disconnected, use your wrench or pliers to loosen the nuts that hold the heating element in place. After loosening the nuts, you can carefully pull out the old heating element from the dishwasher.

7. Install the New Dishwasher Heating Element

Now, it’s time to install the new dishwasher heating element. Insert it into the same position where the old one was located. Make sure it fits snugly in place. Once it’s positioned correctly, use your wrench to tighten the nuts and secure the new heating element.

8. Reconnect the Wires

After securing the new heating element, reconnect the wires exactly as they were attached before. Ensure that the connections are tight and secure, as loose wires could cause electrical issues or prevent the heating element from working.

9. Reattach the Bottom Panel

With the new heating element in place, you can now reattach the bottom panel. Screw it back into place using your screwdriver and ensure that it’s secure.

10. Restore Power and Water Supply

Once everything is back in place, turn the water supply back on and restore power to the dishwasher. You can plug it back in or flip the circuit breaker to restore electricity.

11. Test the Dishwasher

To ensure that the new dishwasher heating element is functioning properly, run a short wash cycle. Check if the water heats up correctly and if your dishes are warm and dry at the end of the cycle. If everything works as expected, congratulations—you’ve successfully replaced your dishwasher heating element!

When to Call a Professional

Although replacing the dishwasher heating element is a manageable task for many DIY enthusiasts, there are times when it’s best to call in a professional. If you’re not comfortable working with electrical components, or if you encounter complications during the replacement process, it’s safer to get professional help. You can reach out to our team at +971545356777 for expert assistance.

Additionally, if you replace the heating element and the issue persists, there could be a larger problem with your dishwasher. In such cases, a professional technician can diagnose and fix the underlying issues to ensure your appliance is working as efficiently as possible.

Conclusion

Replacing a dishwasher heating element may sound intimidating, but with the right tools and step-by-step guidance, it’s a task you can confidently handle on your own. Just remember to take safety precautions, ensure the power is disconnected, and follow each step carefully. Whether you’re dealing with dishes that aren’t getting warm or staying wet after a cycle, replacing the heating element can restore your dishwasher to its full functionality.

However, if you ever feel unsure or need professional help, don’t hesitate to contact us at +971545356777. With a little effort, you’ll soon have your dishwasher back to working like new!

Read More
Dishwasher Rust and Corrosion

Preventing Dishwasher Rust and Corrosion: A Comprehensive Guide

A dishwasher is one of the most convenient appliances in any modern kitchen. However, like all machines, dishwashers are prone to wear and tear. One of the most common issues homeowners face is dishwasher rust and corrosion. If left unchecked, these can shorten the lifespan of your dishwasher and affect its performance. The good news is, with the right preventive measures, you can keep your appliance rust-free and in top condition.

In this blog post, we’ll discuss how you can effectively prevent dishwasher rust and corrosion, extending your dishwasher’s life and ensuring it functions properly for years to come. For more details or assistance, contact us at +971545356777.

What Causes Dishwasher Rust and Corrosion?

Before we dive into prevention tips, it’s crucial to understand what causes dishwasher rust and corrosion in the first place. By knowing the root causes, you can tackle the problem more effectively.

1. High Mineral Content in Water:
Hard water is one of the biggest culprits behind dishwasher rust and corrosion. The high mineral content, specifically calcium and magnesium, can build up on the interior of the dishwasher. Over time, these minerals can damage the appliance’s metal components, leading to corrosion and rust.

2. Poor Maintenance:
Like any other machine, a dishwasher requires regular maintenance. Neglecting routine cleaning can lead to food particles and moisture build-up, accelerating the rusting process. Rust tends to form when water is left stagnant in the appliance for extended periods.

3. Damaged or Worn-Out Racks:
Dishwasher racks are typically coated with plastic, but over time, this coating can chip or wear out. Once the metal underneath is exposed to moisture, rust starts to form. This is one of the most common issues people face, especially with older models.

4. Improper Loading:
Believe it or not, how you load your dishwasher can affect its lifespan. Placing sharp or heavy utensils improperly can scratch the interior, exposing the metal and leading to corrosion over time.

5. Chemical Reactions from Detergents:
Some dishwashing detergents contain harsh chemicals that can accelerate the rusting process, especially if they’re not completely rinsed out. Detergents with chlorine, in particular, are known to damage the internal parts of a dishwasher.

With these causes in mind, let’s move on to how you can prevent dishwasher rust and corrosion. Remember, if you notice any signs of rust or need professional assistance, you can call us at +971545356777.

Regular Maintenance to Prevent Dishwasher Rust and Corrosion

Taking proactive steps through regular maintenance is the best way to prevent rust and corrosion from taking hold in your dishwasher.

1. Clean Your Dishwasher Regularly:
One of the simplest ways to prevent rust is by keeping your dishwasher clean. Regularly remove food particles, soap scum, and other debris that may accumulate at the bottom. Using a dishwasher-safe cleaner every month or two can help keep the interior clean, reducing the risk of rust forming.

2. Check and Replace Damaged Racks:
Inspect your dishwasher racks periodically. If you notice any chipping or cracks in the plastic coating, it’s crucial to address the issue right away. You can purchase rack repair kits that allow you to recoat the exposed metal and prevent rust from forming. If the damage is extensive, consider replacing the racks altogether.

3. Use a Water Softener:
If you live in an area with hard water, a water softener can make a significant difference. By reducing the amount of minerals in the water, you prevent scale build-up, which is a major contributor to rust and corrosion. Not only will this extend the life of your dishwasher, but it will also improve its cleaning performance.

4. Dry Your Dishwasher After Each Cycle:
Leaving moisture inside your dishwasher is a recipe for rust. After each cycle, make sure to dry the interior thoroughly. You can leave the door open for a few hours to let the remaining moisture evaporate or use a clean, dry cloth to wipe it down.

5. Use the Right Detergents:
Not all detergents are created equal. Some contain harsh chemicals that can contribute to dishwasher rust and corrosion. Opt for detergents specifically designed for dishwashers and avoid those containing chlorine. It’s also a good idea to run an extra rinse cycle now and then to ensure no detergent residue is left behind.

If you need help with maintenance or identifying the right products for your dishwasher, feel free to reach out to us at +971545356777.

Rust and Corrosion Prevention Tips for New Dishwashers

If you’ve recently purchased a new dishwasher, you’ll want to keep it rust-free for as long as possible. Taking preventive measures from day one can save you the hassle of dealing with rust and corrosion later on.

1. Apply a Rust-Proof Coating:
Consider applying a rust-proof coating to your dishwasher’s metal components, such as the racks or interior panels. These coatings provide an extra layer of protection against moisture, significantly reducing the chances of rust forming. You can find rust-proof sprays specifically designed for dishwashers, which are easy to apply and highly effective.

2. Install a Water Filtration System:
In addition to a water softener, a whole-house water filtration system can further reduce the chances of rust and corrosion. These systems filter out not only minerals but also chemicals like chlorine, which can cause corrosion over time. Investing in a good filtration system will protect not just your dishwasher but all appliances that use water.

3. Don’t Overload the Dishwasher:
Overloading the dishwasher can cause the racks to warp or the interior to scratch, both of which can lead to rust. Be mindful of how many dishes you’re placing inside and make sure sharp objects like knives are properly positioned to avoid scratching the interior.

4. Use a High-Quality Rinse Aid:
A rinse aid helps reduce water spots and prevents water from clinging to the surfaces of your dishwasher. This reduces the likelihood of moisture build-up, which is a leading cause of rust and corrosion. Look for a high-quality rinse aid and use it regularly to keep your dishwasher in good condition.

5. Schedule Annual Professional Inspections:
Even with proper care, it’s a good idea to have a professional inspect your dishwasher annually. Technicians can identify early signs of rust or corrosion and fix them before they become bigger problems. If you’re unsure about where to find a trusted technician, contact us at +971545356777 for professional assistance.

What to Do If Your Dishwasher Already Has Rust

Unfortunately, even with all the preventive measures in the world, rust can sometimes find its way into your dishwasher. If that’s the case, don’t panic – there are still ways to address the issue and stop it from getting worse.

1. Remove Rust from Dishwasher Racks:
If the rust is limited to the racks, you can use a rust-removal product specifically designed for dishwashers. These products are typically safe for both the appliance and your dishes, but always check the manufacturer’s recommendations. After using the rust remover, apply a repair kit to cover any exposed metal.

2. Clean the Rusted Areas Thoroughly:
If rust has developed on the interior of the dishwasher, you can try using a mixture of baking soda and water to scrub it away. This natural solution for preventing Dishwasher Rust and Corrosion is gentle enough to avoid causing further damage but effective at removing minor rust spots. For more severe rusting, you may need to use a commercial cleaner specifically formulated for dishwashers.

3. Address the Root Cause:
Removing the Dishwasher Rust and Corrosion is just the first step; you also need to address the underlying issue. Whether it’s hard water, a damaged rack, or detergent build-up, make sure to tackle the root cause to prevent the rust from coming back. Regular maintenance, using water softeners, and following the tips we’ve mentioned earlier will help keep the rust at bay.

If the rust is extensive or you’re unsure how to proceed, don’t hesitate to call us at +971545356777 for professional help.

Conclusion

Preventing dishwasher rust and corrosion is essential to maintaining the longevity and efficiency of your appliance. By understanding the causes of rust, performing regular maintenance, and taking preventive steps, you can keep your dishwasher in excellent working condition for years to come. Simple actions like using the right detergents, inspecting your racks, and ensuring proper drying can make a world of difference.

If you ever encounter rust or corrosion problems or need further guidance, feel free to contact us at +971545356777. We’re here to help keep your dishwasher running smoothly!

Read More
Tools for Dishwasher Repair

The Best Tools for Dishwasher Repair

Dishwashers have become an essential part of modern kitchens, saving time and effort while ensuring your dishes are spotlessly clean. However, like any other appliance, dishwashers can develop issues over time. Whether it’s a clogged drain, a faulty motor, or a leaky hose, having the right tools for dishwasher repair can make the process smoother and more efficient. In this comprehensive guide, we’ll explore the best tools you need to keep your dishwasher running like new, ensuring you’re well-equipped for any repair task.

1. Essential Hand Tools for Dishwasher Repair

When it comes to repairing dishwashers, having a reliable set of hand tools is crucial. These tools are the backbone of any repair job, allowing you to tackle everything from loose screws to more complex mechanical issues. Here’s a breakdown of the must-have hand tools for dishwasher repair:

  • Screwdrivers: A set of screwdrivers, both flathead and Phillips, is indispensable. Many dishwasher components are secured with screws that require these tools for removal. Ensure you have various sizes to handle different screw types.
  • Pliers: Needle-nose pliers are perfect for gripping small parts or bending wires. Regular pliers can help with gripping and turning nuts, bolts, and other small parts.
  • Wrenches: Adjustable wrenches are essential for loosening and tightening nuts and bolts. A set of combination wrenches can also be helpful for more specific sizes.
  • Multimeter: Diagnosing electrical issues is often a part of dishwasher repair. A millimeter allows you to test voltage, resistance, and continuity in various components.
  • Nut Drivers: These tools are like screwdrivers but specifically designed to handle nuts and bolts. They’re great for working with fasteners commonly found in dishwashers.

Having these hand tools at your disposal can save you time and money, allowing you to quickly diagnose and fix common dishwasher issues. Remember to keep your tools organized and accessible, so you can easily find what you need when a repair job arises.

2. Specialty Tools for Advanced Dishwasher Repair

While basic hand tools are sufficient for many dishwasher repairs, certain situations require more specialized equipment. These tools are designed to handle specific components and problems, making them invaluable for more complex repair tasks. Here are some of the best specialty tools for dishwasher repair:

  • Torx Screwdrivers: Many modern dishwashers use Torx screws, which have a star-shaped head. A set of Torx screwdrivers is essential for removing and securing these screws during repairs.
  • Hose Clamp Pliers: Dishwashers have several hoses that may need to be replaced or reattached. Hose clamp pliers make it easy to remove and install hose clamps without damaging the hoses themselves.
  • Drain Snake: If your dishwasher’s drain is clogged, a drain snake can help clear the blockage. This tool is particularly useful for reaching clogs that are deep within the plumbing.
  • Wire Strippers: If you need to replace or repair wiring in your dishwasher, wire strippers allow you to remove insulation from wires cleanly and efficiently.
  • Socket Set: A socket set with various sizes is crucial for dealing with bolts and nuts that are difficult to reach with regular wrenches.

Using these specialty tools can significantly enhance your ability to perform effective dishwasher repairs. While they may require a bit of an investment upfront, they’ll pay off in the long run by making complex repairs more manageable.

3. Diagnostic Tools for Accurate Dishwasher Repair

Repairing a dishwasher isn’t just about fixing visible problems; it’s also about accurately diagnosing issues that aren’t immediately apparent. That’s where diagnostic tools come in. These tools help you identify the root cause of problems, ensuring that you don’t waste time and effort fixing the wrong issue. Here are the top diagnostic tools for dishwasher repair:

  • Multimeter: As mentioned earlier, a millimeter is essential for checking electrical components like switches, motors, and heating elements. It allows you to test for voltage, continuity, and resistance, helping you pinpoint electrical problems.
  • Leak Detection Dye: Sometimes, dishwasher leaks are hard to spot. Leak detection dye is a colored liquid that can be added to the water inside the dishwasher. If there’s a leak, the dye will show you exactly where it’s coming from.
  • Infrared Thermometer: This Tools for Dishwasher Repair measures the temperature of different parts of the dishwasher. It’s particularly useful for checking the heating element to ensure it’s functioning properly.
  • Amp Clamp: An amp clamp allows you to measure the current flowing through the dishwasher’s circuits. This is useful for diagnosing issues with the motor, pump, or other electrical components.
  • Water Pressure Gauge: If your dishwasher isn’t cleaning dishes properly, it might be due to low water pressure. A water pressure gauge lets you measure the pressure to ensure it’s within the recommended range for optimal performance.

Investing in these diagnostic tools can make a significant difference in your ability to perform thorough and accurate repairs. By accurately diagnosing the problem, you can avoid unnecessary repairs and get your dishwasher back to optimal performance quickly.

4. Safety Gear for Dishwasher Repair

Safety should always be a top priority when repairing any appliance, including dishwashers. Working with electrical components, sharp tools, and heavy machinery can be dangerous if proper precautions aren’t taken. Here’s the essential safety gear you should have when performing dishwasher repairs:

  • Safety Gloves: Protect your hands from sharp edges, electrical components, and chemicals. A good pair of insulated gloves can also protect you from electrical shocks.
  • Safety Goggles: When working with tools or chemicals, safety goggles protect your eyes from debris, splashes, and dust. They’re particularly important when using tools like wire strippers or pliers.
  • Hearing Protection: Some dishwasher repairs may involve loud noises, especially when dealing with motors or heavy tools. Earplugs or earmuffs can protect your hearing during these tasks.
  • Protective Clothing: Wearing long sleeves and pants can protect your skin from sharp objects and chemical splashes. Consider wearing a lab coat or apron for additional protection.
  • Face Mask: If you’re working in a dusty environment or using chemicals, a face mask can protect your lungs from inhaling harmful particles.

Using the right safety gear is essential for preventing injuries during dishwasher repairs. It ensures that you can work confidently and safely, reducing the risk of accidents and making the repair process more efficient.

5. Maintenance Tools to Extend the Life of Your Dishwasher

Preventive maintenance is key to extending the life of your dishwasher and avoiding frequent repairs. Having the right maintenance tools on hand can help you keep your dishwasher in top condition, reducing the likelihood of major issues down the road. Here are some Tools for Dishwasher Repair that can help with regular dishwasher maintenance:

  • Descaling Agents: Over time, mineral deposits can build up in your dishwasher, affecting its performance. Descaling agents help remove these deposits, ensuring that your dishwasher runs efficiently.
  • Dishwasher Cleaner: Regularly cleaning the interior of your dishwasher is essential for preventing odors, mold, and buildup. Use a dedicated dishwasher cleaner to keep it sparkling and fresh.
  • Gasket Conditioner: The rubber gaskets around the dishwasher door can dry out and crack over time. A gasket conditioner keeps them soft and flexible, preventing leaks and maintaining a tight seal.
  • Brush Set: A set of small brushes is perfect for cleaning hard-to-reach areas like the spray arms, filters, and door seals. Regular cleaning helps prevent clogs and ensures your dishwasher operates at its best.
  • Vacuum: A small handheld vacuum can help you clean out food particles, debris, and dirt from the dishwasher’s interior, especially in the corners and crevices.

By incorporating these maintenance tools for dishwasher repair into your routine, you can significantly extend the lifespan of your dishwasher. Regular maintenance not only prevents costly repairs but also ensures that your dishwasher continues to perform optimally.

Conclusion: Equip Yourself with Tools for Dishwasher Repairs Successfully 

Having the right tools for dishwasher repair is essential for tackling both common and complex issues. From basic hand tools to advanced diagnostic equipment, these Tools for Dishwasher Repair empower you to fix problems quickly and efficiently. Don’t forget the importance of safety gear to protect yourself during repairs, as well as maintenance tools to keep your dishwasher running smoothly for years to come.

If you’re in the UAE and need professional assistance with dishwasher repairs, don’t hesitate to contact us at +971545356777. Our expert technicians are equipped with the best tools and knowledge to handle any dishwasher issue, ensuring your appliance is back in working order as soon as possible.

Read More
Dishwasher Filter

How to Replace a Dishwasher Door Seal: A Step-by-Step Guide

Has your dishwasher been leaking water lately? This might be a sign that the dishwasher door seal has worn out. Over time, door seals can become cracked or brittle, causing leaks and inefficiency in your appliance. Luckily, replacing a dishwasher door seal isn’t as difficult as it may seem. With just a few tools and some guidance, you can handle this task yourself and have your dishwasher back in action, leak-free.

In this guide, we’ll walk you through the steps on how to replace a dishwasher door seal properly, saving you time and money. Plus, you’ll avoid the frustration of dealing with a malfunctioning appliance! Call us at 0508700774 if you need professional help, but if you’re ready to get hands-on, keep reading to learn how to fix that dishwasher door seal like a pro.

What is a Dishwasher Door Seal, and Why is it Important?

A dishwasher door seal (also known as a gasket) is a flexible rubber strip that lines the edges of your dishwasher door. It creates a tight, waterproof seal between the door and the body of the dishwasher, preventing water from leaking out during cycles. Without this seal, your kitchen floor could quickly become a puddle-filled disaster.

This seemingly small part plays a vital role in your dishwasher’s efficiency. A faulty dishwasher door seal can lead to:

  • Water leaks during washing cycles
  • Poor cleaning performance due to compromised water pressure
  • Energy waste, as your dishwasher may not heat water properly

It’s easy to overlook the significance of a dishwasher door seal until something goes wrong. Regularly inspecting the seal for wear and tear can help extend the life of your appliance and prevent avoidable repairs. If you notice cracks, splits, or mold buildup, it’s time to replace it.

Tools You’ll Need to Replace a Dishwasher Door Seal

Before diving into the actual process, gather all the tools and materials required. Having everything within reach will make the job smoother and quicker. Here’s what you’ll need to replace your dishwasher door seal:

  • Replacement dishwasher door seal (make sure it matches your dishwasher model)
  • Phillips head screwdriver
  • Flathead screwdriver (optional)
  • A bucket or towel (in case of water spillage)
  • Warm, soapy water or a cleaning solution
  • Soft cloth or sponge for cleaning
  • Silicone lubricant (optional, for easier installation)

Once you’ve collected these items, you’ll be ready to get started with the actual replacement.

Step 1: Turn Off the Power and Water Supply

Safety first! Before attempting to replace the dishwasher door seal, ensure the power is disconnected. Locate your dishwasher’s circuit breaker in the electrical panel and switch it off. Additionally, turn off the water supply to prevent any unexpected spills.

Once you’ve done that, open the dishwasher door and allow any remaining water to drain. It’s always a good idea to place a towel or bucket underneath the appliance to catch any residual water.

Step 2: Remove the Old Dishwasher Door Seal

Now that your dishwasher is safe to work on, it’s time to remove the old dishwasher door seal. Here’s how:

  1. Locate the old seal: Open the dishwasher door and inspect the perimeter where the door meets the body of the machine. The dishwasher door seal is typically located in a groove running along the top and sides of the door.
  2. Pull out the old seal: Gently pull the old seal out of the groove. It should come out easily, but if it’s stuck, use a flathead screwdriver to carefully pry it out. Be cautious not to damage the groove, as you’ll be installing the new seal in the same spot.
  3. Clean the area: After removing the old dishwasher door seal, clean the groove thoroughly. Use warm, soapy water or a cleaning solution to remove any gunk, mold, or debris that may have accumulated over time. A clean surface ensures that the new seal will fit properly and form a tight, leak-proof barrier.

Step 3: Install the New Dishwasher Door Seal

With the old seal removed and the area cleaned, it’s time to install the new dishwasher door seal. Follow these steps carefully:

  1. Align the new seal: Take your replacement dishwasher door seal and inspect it closely. You’ll notice that it has a specific shape to fit into the groove. Start at the top center of the door, which will make it easier to work your way down both sides.
  2. Press the seal into place: Slowly press the new seal into the groove, ensuring that it fits snugly along the entire perimeter. You may need to apply a bit of force, but be careful not to stretch the seal too much. If you find it difficult to push in, a silicone lubricant can help make the process smoother.
  3. Test for proper fit: Once the seal is in place, close the dishwasher door to test its fit. The door should close firmly and evenly. If the seal feels loose or uneven, adjust it by pressing it more securely into the groove.
  4. Final inspection: After ensuring the new seal is in place, check for any gaps or areas where it might not be sitting correctly. It’s important that the dishwasher door seal forms a complete seal to prevent leaks.

Step 4: Reconnect Power and Water, Then Test the Dishwasher

Now that the new dishwasher door seal is securely in place, it’s time to test your work.

  1. Reconnect the power and water: Turn the power back on by flipping the circuit breaker, and reconnect the water supply to the dishwasher.
  2. Run a test cycle: Close the dishwasher door and run a short cycle. Monitor the dishwasher closely during the cycle, paying particular attention to any leaks around the door. If there are no leaks and the door closes smoothly, you’ve successfully replaced the dishwasher door seal!

Maintenance Tips to Extend the Life of Your Dishwasher Door Seal

Now that you’ve replaced the dishwasher door seal, it’s important to maintain it properly to extend its life and keep your appliance running smoothly. Here are a few maintenance tips:

  1. Regularly clean the seal: Wipe down the dishwasher door seal with a damp cloth every week to remove dirt, food debris, and soap scum. This will prevent buildup that can lead to mold and mildew.
  2. Inspect for wear and tear: Keep an eye on the condition of the seal. If you notice any cracks, tears, or signs of deterioration, it may be time to replace the seal again.
  3. Avoid harsh chemicals: When cleaning the seal, avoid using harsh chemicals that could degrade the rubber. Instead, use mild, soapy water or a vinegar solution for gentle cleaning.
  4. Check for proper alignment: Periodically check that the door is closing properly and that the seal remains snug in the groove. A properly aligned door ensures a strong, water-tight seal.

Taking these small steps can prevent future leaks and help your dishwasher last for years to come.

When to Call a Professional

While replacing a dishwasher door seal is generally a straightforward task, there are times when it’s best to call in a professional. If you’ve followed the steps above and still experience leaks or difficulty closing the door, it could indicate a more serious issue with your dishwasher’s door alignment or internal components.

In such cases, feel free to contact us at 0508700774 for expert assistance. Our team can quickly diagnose and fix any issues, ensuring your dishwasher runs smoothly without any hassle.

Conclusion

Replacing a dishwasher door seal is a simple DIY task that can save you time, money, and a big mess in your kitchen. By following the steps outlined in this guide, you can easily restore your dishwasher’s efficiency and prevent any water damage from occurring.

Remember, the key to a successful replacement is ensuring that the new dishwasher door seal is properly installed and maintained. Whether you’re fixing it yourself or reaching out for professional help, keeping this small but crucial component in top shape will extend the life of your dishwasher.

Don’t hesitate to call us at 0508700774 if you need any further assistance or have questions about maintaining your dishwasher. Happy fixing!

Read More
Dishwasher Spray Arm

How to Replace a Dishwasher Spray Arm: A Step-by-Step Guide

Dishwashers are a staple in many homes, making the chore of cleaning dishes much easier. However, like any appliance, parts can wear out over time. One common issue is a malfunctioning dishwasher spray arm. If your dishwasher isn’t cleaning dishes as it should, the spray arm might be the culprit. Replacing a dishwasher spray arm can seem daunting, but with a little guidance, it’s a task that most homeowners can handle themselves. In this guide, we’ll walk you through the process step-by-step.

Understanding the Dishwasher Spray Arm

The dishwasher spray arm is a crucial component of your dishwasher. It’s the part that spins and sprays water throughout the dishwasher, ensuring all your dishes get clean. Over time, debris can clog the holes, or the arm itself might break or become less efficient. When this happens, replacing the dishwasher spray arm is often the best solution to restore your dishwasher’s performance.

Why Is the Dishwasher Spray Arm Important?

The dishwasher spray arm ensures that water reaches every corner of the dishwasher, cleaning all the dishes effectively. If it’s not working correctly, you might find food residue or spots on your dishes after a cycle. A faulty spray arm can lead to ineffective cleaning, increased water usage, and even longer cycle times as you might need to run the dishwasher more than once. Therefore, maintaining and replacing the dishwasher spray arm when necessary is crucial for optimal performance.

Signs Your Dishwasher Spray Arm Needs Replacement

Before jumping into the replacement process, it’s essential to identify if the dishwasher spray arm is indeed the problem. Here are some signs to look out for:

  1. Dishes Aren’t Clean: If your dishes consistently come out dirty, it might be due to a clogged or broken spray arm.
  2. Noisy Operation: A noisy dishwasher could indicate that the spray arm isn’t spinning properly or is hitting something inside.
  3. Visible Damage: Inspect the spray arm for cracks, breaks, or lodged debris that might be affecting its performance.
  4. Water Isn’t Reaching the Top Rack: If the dishes on the top rack aren’t getting clean, it might be due to an ineffective upper spray arm.

Understanding these signs can save you time and effort, ensuring that replacing the dishwasher spray arm is indeed necessary.

Preparing for the Replacement

Replacing a dishwasher spray arm requires some preparation. Here’s a list of tools and materials you’ll need to get started:

Tools and Materials Needed

  • Replacement dishwasher spray arm
  • Screwdriver
  • Pliers
  • Towel or sponge
  • Vinegar or mild detergent
  • Toothbrush or small cleaning brush

Safety First

Before starting the replacement process, ensure that your safety is prioritized. Unplug the dishwasher or turn off the power at the circuit breaker. Also, shut off the water supply to prevent any leaks or water damage during the process.

Finding the Right Replacement Part

When purchasing a replacement dishwasher spray arm, ensure that it’s compatible with your dishwasher model. You can find this information in the dishwasher’s manual or on the manufacturer’s website. Buying the correct part is crucial for a successful replacement and optimal dishwasher performance.

Cleaning the Dishwasher

Before replacing the dishwasher spray arm, it’s a good idea to clean the interior of the dishwasher. Use a mixture of vinegar and water or a mild detergent to wipe down the walls and racks. This cleaning step helps remove any residual grime or debris that might interfere with the new spray arm’s function.

Step-by-Step Guide to Replacing the Dishwasher Spray Arm

With everything prepared, it’s time to replace the dishwasher spray arm. Follow these detailed steps to ensure a successful replacement:

Step 1: Remove the Lower Dish Rack

Start by pulling out the lower dish rack to give you access to the spray arm. Most dish racks slide out easily, but if yours has a locking mechanism, gently lift it to release the rack.

Step 2: Locate the Spray Arm

Once the rack is out, you’ll see the lower dishwasher spray arm. It’s usually attached to the bottom of the dishwasher. Examine how it’s attached; this will help when it comes time to remove and replace it.

Step 3: Remove the Old Spray Arm

Depending on your dishwasher model, the spray arm might snap into place, or it could be held by screws. If it snaps in, gently pull it upward to release it. If it’s screwed in, use a screwdriver to carefully remove the screws. Be sure to keep any screws or small parts in a safe place.

Step 4: Clean the Area

Before installing the new spray arm, clean the area where the old arm was attached. Use a toothbrush or small brush to remove any debris or buildup. This step ensures that the new dishwasher spray arm will spin freely and function correctly.

Step 5: Install the New Spray Arm

Now it’s time to install the new dishwasher spray arm. Align it with the attachment point and either snap it into place or secure it with screws. Ensure that it’s tightly attached and can spin freely without obstruction.

Step 6: Test the Installation

Once the new spray arm is installed, replace the lower dish rack and run a test cycle without dishes. This test will help you confirm that the new spray arm is functioning correctly and that there are no leaks or unusual noises.

Step 7: Check for Proper Operation

After the test cycle, inspect the dishwasher for any issues. If the dishwasher spray arm is working correctly, you should notice improved cleaning performance. If problems persist, ensure that the arm is installed correctly and that there are no obstructions.

Troubleshooting Common Issues

Even after replacing the dishwasher spray arm, you might encounter some issues. Here are a few common problems and their solutions:

Spray Arm Isn’t Spinning

If the new dishwasher spray arm isn’t spinning, check for obstructions. Ensure that it’s installed correctly and that there’s nothing blocking its movement. Sometimes, debris can get lodged in the arm’s attachment point, preventing it from spinning freely.

Persistent Noises

If you hear unusual noises, ensure that the dishwasher spray arm isn’t hitting any dishes or the dishwasher walls. Make sure that it’s secured tightly and can spin without obstruction. Also, check if the spray arm is compatible with your dishwasher model.

Dishes Aren’t Clean

If dishes are still not getting clean, ensure that water is flowing freely through the dishwasher spray arm. Check for clogs in the spray holes or the water inlet. Sometimes, the issue might be with the water pressure or the dishwasher’s internal water flow.

Maintaining Your Dishwasher Spray Arm

Once you’ve replaced the dishwasher spray arm, maintaining it is crucial for long-term performance. Regular cleaning and maintenance can prevent future issues and extend the life of your dishwasher.

Regular Cleaning

Clean the spray arm periodically by removing it and rinsing it under warm water. Use a small brush to clean the spray holes and remove any debris or mineral buildup. Regular cleaning helps maintain optimal water flow and prevents clogs.

Inspect for Damage

Periodically inspect the dishwasher spray arm for any signs of damage or wear. Cracks, breaks, or other visible damage can affect its performance. Replace the spray arm immediately if you notice any issues to avoid further damage to your dishwasher.

Use the Right Detergents

Using the correct dishwasher detergents can prevent buildup and ensure the spray arm functions correctly. Avoid using too much detergent, as excess soap can lead to residue and clogging. Refer to your dishwasher’s manual for recommendations on detergent types and amounts.

Check Water Temperature

Ensure that your dishwasher is operating at the recommended water temperature. Hot water helps dissolve detergent and remove food particles effectively. If the water isn’t hot enough, it can affect the cleaning performance and the efficiency of the dishwasher spray arm.

Conclusion

Replacing a dishwasher spray arm might seem intimidating at first, but with the right tools and instructions, it’s a manageable task for most homeowners. By understanding the importance of the dishwasher spray arm and following this step-by-step guide, you can ensure your dishwasher continues to operate efficiently and effectively. Regular maintenance and prompt replacement of faulty parts will keep your dishwasher in top shape, saving you time and effort in the long run.

For any questions or professional assistance, feel free to contact us at 0508700774. Happy dishwashing!

Read More
  • 1
  • 2
error: Content is protected !!