Coin Operated Washing Machine Ajman-0508700774
Coin-operated Washer Ajman-0508700774 FAM’s selection of coin-operated washing machines caters to a wide array of commercial and residential needs. From compact models suitable for small establishments to robust machines designed for high-volume laundry facilities, FAM ensures that every client’s requirement is met with precision. Introduction The evolution of laundry services in Ajman […]
Coin Operated Washing Machine Sharjah-0508700774
Coin-Operated Washing Machines in Sharjah-0508700774. Coin-operated washing machines, also known as coin-operated laundry machines or coin washers, are self-service laundry machines that allow users to wash their clothes by inserting coins into the machine. These machines are typically found in laundromats, apartment complexes, and other communal living spaces, providing a convenient solution for individuals […]
Coin Operated Washing Machine Dubai-0508700774
Coin-operated washing machine suppliers in Dubai. Fam has established itself as a leading supplier of coin-operated washing machines. In the vibrant city of Dubai, where innovation meets tradition, Fam has established itself as a leading supplier of coin-operated washing machines. Fam’s commitment to quality and customer satisfaction has made it a household name […]
Coin Operated Washing Machine Abu Dhabi-0508700774
In UAE, the FAM Coin Operated Wending Washer Supplier Contact information: 0508700774 stands out as a beacon of progress in the supply of coin-operated washing machines. With a mission to cater to the MENA Introduction The rise of coin-operated washing machines in Abu Dhabi The convenience and efficiency they offer The Market for […]
Daewoo Service Center Dubai-0545354777
Daewoo Service Center Dubai-0545354777 Daewoo Appliance service centers in Dubai, Abu Dhabi, Sharjah, and Ajman, UAE, help you navigate the world of customer support with ease. Daewoo Service Centers: Your Go-To Solution When your Daewoo device starts acting up, whether it’s a software glitch or a hardware malfunction, visiting an authorized service center is your […]
Siemens Service Center Dubai-0545354777
Siemens Service Center Dubai-0545354777 Siemens Appliance service centers in Dubai, Abu Dhabi, Sharjah, and Ajman, UAE, help you navigate the world of customer support with ease. Siemens Service Centers: Your Go-To Solution When your Siemens device starts acting up, whether it’s a software glitch or a hardware malfunction, visiting an authorized service center is your […]
Super General Refrigerator Repairs Abu Dhabi-0545354777
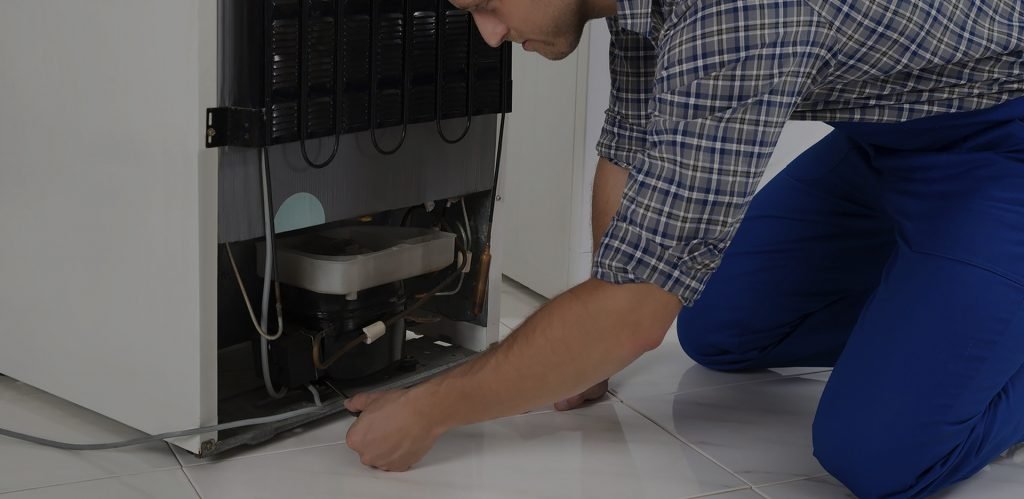
Super General Refrigerator Repairs Abu Dhabi-0545354777 Refrigerator is an essential appliance in every household, and Super General refrigerators repairs are known for their innovation and reliability. However, like any other electronic device, they may encounter issues over time. Fortunately, many common refrigerator problems can be resolved with simple troubleshooting techniques and basic maintenance. In this […]
Daewoo Refrigerator Repairs-0545354777
Daewoo Refrigerator Repairs-0545354777 Refrigerator is an essential appliance in every household, and Daewoo refrigerators repairs are known for their innovation and reliability. However, like any other electronic device, they may encounter issues over time. Fortunately, many common refrigerator problems can be resolved with simple troubleshooting techniques and basic maintenance. In this blog, we’ll explore some […]
Super General Refrigerator Repairs-0545354777

Super General Refrigerator Repairs-0545354777 Refrigerator is an essential appliance in every household, and Super General refrigerators repairs-0545354777 are known for their innovation and reliability. However, like any other electronic device, they may encounter issues over time. Fortunately, many common refrigerator problems can be resolved with simple troubleshooting techniques and basic maintenance. In this blog, we’ll […]
Samsung Refrigerator Repairs-0545354777
A refrigerator is an essential appliance in every household, and Samsung refrigerators repairs are known for their innovation and reliability. However, like any other electronic device, they may encounter issues over time. Fortunately, many common refrigerator problems can be resolved with simple troubleshooting techniques and basic maintenance. In this blog, we’ll explore some common issues […]
Samsung Dryer Repairs UAE-0545354777
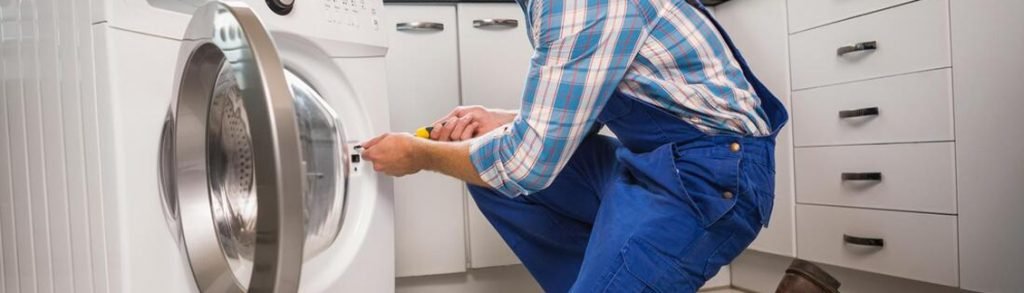
Samsung Clothes Dryer Repairs : Samsung Clothes dryers have become an essential appliance in UAE, our remarkable repair services are available in Dubai, Abu Dhabi, Ajman, and other Emirates. making laundry chores more convenient and efficient. Samsung, a renowned brand in the home appliance industry, offers a wide range of high-quality clothes dryers. However, […]
Hoover Dryer Repairs UAE-0545354777
Hoover Clothes Dryer Repairs : Hoover Clothes dryers have become an essential appliance in UAE, our remarkable repair services are available in Dubai, Abu Dhabi, Ajman, and other Emirates. making laundry chores more convenient and efficient. Hoover, a renowned brand in the home appliance industry, offers a wide range of high-quality clothes dryers. However, […]