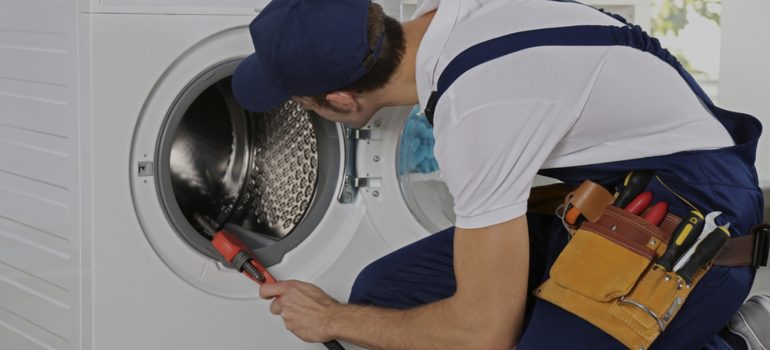
Noisy Washing Machine

How to Fix a Noisy Washing Machine

Is your washing machine making more noise than usual? A noisy washing machine can be a real nuisance, disrupting the peace of your home and signaling that something might be wrong. Whether it’s rattling, banging, or vibrating excessively, a noisy washing machine isn’t just annoying—it could be a sign that you need to address an issue before it becomes a costly repair. In this blog, we’ll dive into the common causes of washing machine noise, how to diagnose the problem, and practical steps to fix it. Let’s ensure your laundry routine returns to being a quiet, peaceful task.

Understanding the Causes of a Noisy Washing Machine

Before diving into solutions, it’s important to understand the potential causes of a noisy washing machine. Identifying the root cause is crucial to fixing the issue effectively.

Unbalanced Load

One of the most common reasons for a noisy washing machine is an unbalanced load. When clothes are not evenly distributed in the drum, it can cause the machine to become off-balance during the spin cycle. This imbalance leads to banging and thumping sounds, which can be alarming but are usually easy to fix.

Worn Out Bearings

Bearings support the drum of the washing machine and help it spin smoothly. Over time, these bearings can wear out, leading to a grinding or whining noise. This issue requires prompt attention, as neglected bearings can damage other components of the machine.

Loose or Damaged Drum

If the drum is loose or damaged, it can create a loud noise when spinning. The drum might be knocking against other parts of the machine, leading to a noticeable sound during operation. This issue often requires a professional inspection to determine if repair or replacement is necessary.

Faulty Motor

The motor is the heart of the washing machine. If the motor is faulty, it can produce strange noises. A buzzing or humming sound might indicate a problem with the motor or its components, and it could mean that some parts are worn out or need to be replaced.

Clogged or Faulty Pump

The pump in a washing machine drains the water during the wash cycle. If it becomes clogged with debris or is malfunctioning, it can lead to loud noises. A faulty pump might produce a gurgling or grinding noise, indicating that it needs cleaning or replacement.

Loose Parts or Fasteners

Sometimes, a noisy washing machine is simply the result of loose parts or fasteners. Over time, vibration and movement can cause screws and other components to loosen. Tightening these parts can often resolve the noise issue.

Understanding these common causes of a noisy washing machine will help you diagnose and fix the problem more efficiently. Keep these potential issues in mind as we explore how to address them in the following sections.

Diagnosing Your Noisy Washing Machine

Once you’ve understood the potential causes, the next step is diagnosing the specific issue your washing machine is facing. Here’s how to get started with identifying what’s making your washing machine so noisy.

Listen Closely

The first step in diagnosing a noisy washing machine is to listen carefully. Different noises can indicate different problems. For instance, a banging noise may suggest an unbalanced load, while a grinding noise might point to worn-out bearings. By identifying the type of noise, you can narrow down the possible causes.

Check for Balance

To determine if an unbalanced load is causing the noise, stop the machine and redistribute the clothes evenly in the drum. Make sure that heavier items are spread out and not clumped together. Restart the machine and see if the noise persists. If the noise stops, an unbalanced load was likely the culprit.

Inspect the Drum

Open the washing machine and inspect the drum for any visible signs of damage or looseness. Try to move the drum manually. If it feels loose or wobbles significantly, the bearings or the drum itself might be worn out. This issue usually requires professional repair.

Examine the Motor and Pump

To check the motor and pump, unplug the washing machine and remove the back panel to access these components. Look for any visible signs of damage or wear. If you suspect an issue with the motor or pump, it might be best to contact a professional, as these parts can be complex and dangerous to handle without proper expertise.

Tighten Loose Parts

Inspect the washing machine for any loose parts or fasteners. Use a screwdriver or wrench to tighten any screws or bolts that might have come loose over time. Pay special attention to the feet of the washing machine, as they play a crucial role in stabilizing the machine during operation.

Call for Professional Help

If you’ve tried diagnosing the issue but still can’t identify the problem, or if the solution seems beyond your skill level, it might be time to call a professional. A trained technician can provide a thorough inspection and offer solutions that ensure the longevity and efficiency of your washing machine.

By following these diagnostic steps, you can identify the cause of your noisy washing machine and take appropriate action. Now, let’s move on to the solutions that can help you fix these common issues.

Solutions for a Noisy Washing Machine

After diagnosing the issue, it’s time to roll up your sleeves and tackle the problem. Here are some practical solutions for fixing a noisy washing machine.

Fixing an Unbalanced Load

If an unbalanced load is causing the noise, here’s how to fix it:

  1. Stop the Machine: As soon as you hear the noise, stop the washing machine to prevent further imbalance.
  2. Redistribute Clothes: Open the drum and redistribute the clothes evenly. Separate heavy items and spread them out across the drum.
  3. Adjust the Load Size: Avoid overloading the machine. Follow the manufacturer’s guidelines for load size and avoid cramming too many clothes in at once.
  4. Use a Laundry Ball: Consider using a laundry ball or wash booster to help keep clothes separated and balanced during the wash cycle.

Replacing Worn Out Bearings

If worn-out bearings are causing the noise, replacement might be necessary. This task is best left to a professional due to the complexity and risk involved. Here’s what the process typically involves:

  1. Remove the Drum: The drum needs to be taken out to access the bearings. This requires dismantling parts of the washing machine.
  2. Replace the Bearings: The old bearings are removed and replaced with new ones. It’s crucial to ensure the new bearings are compatible with your washing machine model.
  3. Reassemble the Machine: Once the new bearings are in place, reassemble the washing machine and test it to ensure the noise is gone.

Repairing or Replacing the Drum

If the drum is loose or damaged, it may need repair or replacement. Here’s what to do:

  1. Inspect the Drum: Check for visible damage or loose connections.
  2. Tighten Connections: If the drum is loose, tighten any screws or fasteners holding it in place.
  3. Contact a Professional: If the drum is damaged, contact a professional for repair or replacement. This task requires specialized tools and expertise.

Addressing a Faulty Motor

A faulty motor can produce a variety of noises, indicating the need for inspection and potential replacement:

  1. Check for Obstructions: Ensure no debris or clothing items are caught in the motor.
  2. Inspect the Motor: Look for signs of wear or damage. If you suspect a problem, call a professional technician for assessment and repair.
  3. Consider Replacement: If the motor is beyond repair, replacement might be necessary to restore the washing machine’s functionality.

Cleaning or Replacing the Pump

If the pump is causing noise, cleaning or replacing it can help:

  1. Clean the Pump: Unplug the machine and access the pump. Remove any debris or blockages that might be causing noise.
  2. Inspect the Pump: Check for signs of wear or damage.
  3. Replace if Necessary: If the pump is malfunctioning, replace it with a new one that matches your washing machine’s specifications.

Tightening Loose Parts

Loose parts can often be fixed with a simple tightening:

  1. Inspect the Machine: Look for loose screws, bolts, or fasteners.
  2. Tighten the Parts: Use a screwdriver or wrench to secure loose parts.
  3. Stabilize the Feet: Ensure the washing machine’s feet are level and stable to prevent excessive vibration.

By following these solutions, you can effectively address the common causes of a noisy washing machine and restore peace to your laundry routine. However, if you’re unsure or uncomfortable performing any of these tasks, don’t hesitate to seek professional assistance.

Preventing Future Noise Issues

Prevention is key to keeping your washing machine running smoothly and quietly. Here are some tips to help you prevent future noise issues and maintain your washing machine’s performance.

Regular Maintenance

Performing regular maintenance on your washing machine can go a long way in preventing noise problems:

  • Clean the Machine: Regularly clean the drum, filters, and detergent drawer to prevent buildup of dirt and debris.
  • Inspect Parts: Periodically inspect parts like the motor, pump, and bearings for signs of wear and tear.
  • Tighten Fasteners: Check and tighten any loose screws or bolts to ensure the machine remains stable during operation.

Proper Loading Techniques

Adopting proper loading techniques can help prevent imbalance and noise issues:

  • Follow Load Guidelines: Adhere to the manufacturer’s guidelines for load size and distribution.
  • Balance the Load: Distribute clothes evenly in the drum to prevent imbalance during the spin cycle.
  • Use a Load Sensor: If your washing machine has a load sensor, use it to ensure optimal load size and balance.

Avoiding Overloading

Overloading your washing machine can strain its components and lead to noise problems:

  • Respect Capacity Limits: Be mindful of the washing machine’s capacity limits and avoid overloading it with too many clothes.
  • Wash Large Items Separately: Wash bulky items like blankets and towels separately to prevent imbalance.
  • Spread Out Heavy Items: Ensure heavy items are evenly distributed in the drum to prevent imbalance during the spin cycle.

Monitoring for Early Signs

Being vigilant and proactive can help you catch potential issues before they become major problems:

  • Listen for Unusual Noises: Pay attention to any unusual noises coming from your washing machine and address them promptly.
  • Watch for Vibrations: Monitor for excessive vibrations during the spin cycle, as this can indicate an imbalance or other issue.
  • Schedule Regular Inspections: Consider scheduling regular inspections with a professional technician to catch potential issues early.

By following these preventive measures, you can extend the life of your washing machine and reduce the likelihood of noise issues. Remember, regular maintenance and proper care are essential for keeping your appliance running smoothly.

When to Call a Professional

While many noise issues can be resolved with DIY solutions, some problems may require professional assistance. Here’s when to consider calling a professional for help:

Complex Repairs

If the issue involves complex repairs, such as replacing bearings or the motor, it’s best to call a professional. These tasks require specialized tools and expertise to ensure proper installation and functionality.

Persistent Noise

If you’ve tried DIY solutions but the noise persists, it’s time to seek professional help. A trained technician can accurately diagnose the problem and provide effective solutions.

Warranty Considerations

If your washing machine is still under warranty, avoid attempting repairs yourself. DIY repairs can void the warranty and lead to additional costs. Instead, contact the manufacturer or an authorized service provider for assistance.

Safety Concerns

If you’re unsure or uncomfortable with any repair process, prioritize safety and call a professional. Attempting complex repairs without proper knowledge can result in injury or further damage to the machine.

Contacting a Professional

If you need professional assistance with your noisy washing machine, don’t hesitate to reach out for help. Contact us at 0508700774 to schedule a service appointment with one of our experienced technicians. We’re here to help you get your washing machine back to its quiet and efficient operation.

By knowing when to call a professional, you can ensure your washing machine receives the proper care and attention it needs, preventing further damage and ensuring its longevity.

Conclusion

A noisy washing machine can be more than just an annoyance; it can be a sign of underlying issues that need attention. By understanding the common causes of washing machine noise, diagnosing the problem, and implementing effective solutions, you can restore peace to your laundry routine. Remember to perform regular maintenance, adopt proper loading techniques, and seek professional help when necessary. With these tips, you can keep your washing machine running smoothly and quietly for years to come. If you have any questions or need professional assistance, feel free to contact us at 0508700774. We’re here to help you enjoy a quieter, more efficient laundry experience.

Read More
Washing Machine That Won't Start

How to Fix a Washing Machine That Won’t Start

A washing machine is an essential appliance in every household, making laundry tasks quick and convenient. But what happens when your Washing Machine That Won’t Start? It can be frustrating and inconvenient. Before you call a repair technician, there are several troubleshooting steps you can take to identify and possibly fix the problem yourself. This guide will walk you through the common issues and solutions for a washing machine that won’t start.

Understanding the Basics

When your washing machine that won’t start, it’s important to understand the basic components that could be causing the issue. These components include:

  1. Power Supply: Ensure the washing machine is properly plugged in and the outlet is working.
  2. Door/Lid Switch: Most washers have a switch that prevents the machine from starting if the door or lid is open.
  3. Control Panel: The control panel or timer could be malfunctioning.
  4. Water Supply: Check if the water is properly connected and turned on.

By understanding these basic elements, you can begin to troubleshoot the problem effectively.

Check the Power Supply

One of the most common reasons a washing machine that won’t start is a power supply issue. Here’s how to check and address it:

  1. Ensure It’s Plugged In: This might seem obvious, but it’s always best to start with the simplest solution. Ensure the washing machine is plugged into a functioning electrical outlet.
  2. Test the Outlet: Use another device, like a lamp or phone charger, to verify if the outlet is working. If the outlet isn’t providing power, check your circuit breaker or fuse box for tripped breakers or blown fuses.
  3. Inspect the Power Cord: Examine the washing machine’s power cord for any signs of damage, such as fraying or cuts. If the cord is damaged, it may need to be replaced by a professional.
  4. Reset the Machine: Some washing machines have a reset button or procedure. Check your user manual for specific instructions on how to reset your model.

If the power supply is not the issue, move on to checking the washing machine’s components.

Inspect the Door/Lid Switch

The door or lid switch is a safety feature in most washing machines that prevents the machine from starting when the door or lid is open. If this switch is faulty, it may prevent the machine from starting even when closed.

  1. Listen for a Click: When you close the door or lid, listen for a click indicating the switch is engaged. If you don’t hear a click, the switch may be malfunctioning.
  2. Check the Alignment: Ensure the door or lid is properly aligned. Misalignment can prevent the switch from engaging.
  3. Test the Switch: Use a multimeter to test the continuity of the switch. If it lacks continuity when closed, it may need to be replaced.
  4. Clean the Switch: Dirt and debris can prevent the switch from functioning correctly. Gently clean the switch area and try starting the machine again.

If the door or lid switch appears to be in working order, the issue may lie within the control panel.

Evaluate the Control Panel or Timer

The control panel or timer in your Washing Machine That Won’t Start manages the start and operation of the machine. If it’s malfunctioning, the washer may not start.

  1. Inspect for Damage: Check the control panel for any visible damage, such as cracked or stuck buttons.
  2. Test the Timer: If your washing machine uses a mechanical timer, listen for ticking when the dial is turned. If there’s no ticking, the timer may be faulty.
  3. Check for Error Codes: Many modern washing machines have digital displays that show error codes. Refer to your user manual to interpret any codes shown.
  4. Reset the Control Panel: Unplug the washing machine for a few minutes and then plug it back in. This can reset the control panel and resolve minor software issues.

If resetting the control panel doesn’t work, it may be time to contact a professional for assistance.

Examine the Water Supply

A washing machine requires a proper water supply to function. If the water supply is interrupted, the Washing Machine That Won’t Start.

  1. Check the Water Valves: Ensure the water supply valves are open. Sometimes, they may be turned off during maintenance or cleaning.
  2. Inspect the Hoses: Examine the water inlet hoses for kinks, blockages, or leaks. Clear any obstructions and tighten any loose connections.
  3. Test the Water Pressure: Low water pressure can prevent the washing machine from starting. Ensure your home’s water pressure is adequate for the machine’s requirements.
  4. Clean the Inlet Screens: Washing machines have inlet screens to filter debris from the water supply. Over time, these screens can become clogged. Remove and clean them to ensure proper water flow.

If the water supply is not the problem, you may need to investigate the motor or other internal components.

Check the Motor and Drive Belt

The motor and drive belt are crucial for the operation of a Washing Machine That Won’t Start. If either is faulty, the machine may not start.

  1. Listen for Motor Sounds: When attempting to start the machine, listen for any unusual sounds from the motor. Grinding or humming noises may indicate a problem.
  2. Inspect the Drive Belt: The drive belt connects the motor to the drum. Check for signs of wear, damage, or slippage. If the belt is loose or broken, it will need to be replaced.
  3. Test the Motor: If you suspect a motor issue, it may require testing by a professional. They can use specialized tools to assess motor functionality.
  4. Look for Overheating: Sometimes, the motor may overheat and automatically shut off. Allow the machine to cool down and try restarting.

If you’re unable to determine the issue, it may be time to seek professional help.

When to Call a Professional

While many washing machine issues can be resolved with DIY troubleshooting, some problems require professional expertise. Consider calling a repair technician if:

  1. Electrical Issues: You suspect wiring problems or need help testing electrical components.
  2. Complex Repairs: Issues with the motor, drive belt, or control panel often require professional diagnosis and repair.
  3. Warranty Concerns: If your washing machine is still under warranty, attempting repairs yourself may void the warranty. Contact the manufacturer or authorized service provider.
  4. Safety Concerns: If you’re unsure or uncomfortable with any troubleshooting steps, it’s best to contact a professional to avoid injury or further damage.

Professional repair services can provide a thorough diagnosis and ensure your washing machine is fixed correctly and safely.

Preventive Maintenance Tips

Once your Washing Machine That Won’t Start  is up and running, consider implementing preventive maintenance to keep it in good working condition:

  1. Regular Cleaning: Clean the detergent drawer, drum, and filter regularly to prevent buildup and odors.
  2. Balance the Load: Avoid overloading the machine to reduce strain on the motor and other components.
  3. Use the Right Detergent: Use detergents specifically designed for washing machines to prevent residue buildup.
  4. Check for Leaks: Periodically inspect hoses and connections for leaks or signs of wear.
  5. Level the Machine: Ensure your washing machine is level to prevent excessive vibration and noise.

By following these tips, you can extend the life of your washing machine and reduce the likelihood of future issues.

Conclusion

A Washing Machine That Won’t Start can be a frustrating problem, but with a bit of troubleshooting, you may be able to fix it yourself. Start by checking the power supply, door/lid switch, control panel, water supply, motor, and drive belt. If you’re unable to resolve the issue or feel uncomfortable performing these steps, don’t hesitate to contact a professional. For reliable repair services, call 0508700774.

By taking proactive steps to maintain your Washing Machine That Won’t Start, you can ensure it continues to serve your household efficiently for years to come. Remember, when in doubt, it’s always best to seek professional assistance to avoid further damage or safety hazards.

Read More
Washing Machine That Won't Start

Understanding Washing Machine Error Codes

Washing machines have become an essential part of our daily lives, helping us keep our clothes clean and fresh with minimal effort. However, like any other appliance, they can sometimes encounter problems. Fortunately, most modern washing machines come equipped with error codes to help users diagnose and fix issues without having to call a technician immediately. In this article, we will explore various washing machine error codes, what they mean, and how you can troubleshoot them on your own. If you need immediate assistance, feel free to call us at 0508700774.

What Are Washing Machine Error Codes?

Washing Machine Error Codes are alphanumeric codes displayed on the machine’s control panel when it encounters a problem. These codes are designed to give you insight into what might be going wrong with your washing machine. By understanding these codes, you can save time and money by potentially fixing minor issues yourself. Knowing what these error codes mean can be the difference between a quick fix and an expensive repair bill.

Error codes can indicate a range of issues, from minor problems like an unbalanced load to more serious issues like a malfunctioning motor. Each washing machine brand and model may have different error codes, so it’s essential to refer to your user manual for specifics. However, some error codes are common across different brands, and understanding these can be incredibly helpful.

Common Error Codes and Their Meanings

E1/F1: Water Supply Issues

  • Meaning: This error code typically indicates that the washing machine is having trouble filling with water. This could be due to a blocked or kinked hose, a closed water tap, or a malfunctioning water inlet valve.
  • Troubleshooting: Check if the water supply is turned on and ensure there are no kinks in the hose. If the problem persists, inspect the water inlet valve for any blockages or malfunctions.

E2/F2: Drainage Problems

  • Meaning: This code appears when the machine is unable to drain water. This could be caused by a clogged drain hose or filter, or a faulty pump.
  • Troubleshooting: Inspect and clean the drain hose and filter. Make sure there are no blockages preventing water from draining. If necessary, check the pump for any issues.

E3/F3: Door Lock Malfunction

  • Meaning: This error indicates that the door is not locking or unlocking correctly. It could be due to a misaligned door, a faulty door lock mechanism, or an electrical problem.
  • Troubleshooting: Ensure the door is properly aligned and closes securely. If the problem persists, the door lock mechanism may need to be repaired or replaced.

Understanding these Washing Machine Error Codes can empower you to troubleshoot and resolve issues quickly, keeping your appliance running smoothly and extending its lifespan.

Troubleshooting Common Washing Machine Error Codes

Washing Machine Error Codes

While some error codes require professional repair, many Washing Machine Error Codes can be fixed at home with a little troubleshooting. By learning how to address these common problems, you can avoid unnecessary service calls and extend the life of your washing machine. Let’s dive into how you can troubleshoot some of these common error codes.

Water Supply and Drainage Issues

Water Supply Issues (E1/F1)

  • Steps to Fix:
  1. Check Water Source: Ensure that the water taps are fully open and that there is no disruption in the water supply.
  2. Inspect Hoses: Look for any bends or kinks in the water hoses that could be restricting water flow. Straighten them out if needed.
  3. Clean Filters: Some washing machines have filters at the inlet that can become clogged. Clean these filters to ensure a steady flow of water.
  4. Valve Check: If the above steps don’t work, the water inlet valve may be faulty and might need replacement.

Drainage Problems (E2/F2)

    • Steps to Fix:
      1. Clean Drain Hose: Remove and clean the drain hose, ensuring there are no clogs or kinks.
      2. Filter Inspection: Check the pump filter, which might be clogged with lint or debris. Cleaning this can often solve drainage issues.
      3. Check Pump Function: If the machine still doesn’t drain, the drain pump could be defective and may need servicing or replacement.

Door Lock and Load Balance Issues

Door Lock Malfunction (E3/F3)

    • Steps to Fix:
  1. Realign Door: Make sure the door is correctly aligned and not obstructed.
  2. Electrical Check: If the lock isn’t working, check the electrical connections to the door lock for any loose wires.
  3. Replace Lock: If none of the above works, you may need to replace the door lock mechanism.

Load Balance Issues:

    • Meaning: When your washing machine displays an error related to an unbalanced load, it means the load inside the drum is not evenly distributed.
    • Steps to Fix:
      1. Redistribute Load: Open the door and redistribute the clothes more evenly.
      2. Remove Some Items: If the load is too heavy, remove a few items to lighten the drum.
      3. Level Machine: Ensure your washing machine is level on the ground, as uneven flooring can cause imbalance.

By understanding and troubleshooting these common Washing Machine Error Codes, you can maintain the efficiency of your appliance and avoid unnecessary costs. If you ever find yourself stuck, don’t hesitate to reach out for professional help at 0508700774.

When to Call a Professional

While many Washing Machine Error Codes can be resolved with a little DIY troubleshooting, there are instances when calling a professional is the best course of action. Understanding when to call for help can save you from making a problem worse and ensure your washing machine gets the care it needs.

Persistent Error Codes

Repeated Issues

    • If you find that the same error code keeps appearing despite your best efforts to fix it, this could indicate a more serious underlying problem that requires professional attention.

Complex Electrical Problems:

    • Error codes related to electrical components such as the control board, sensors, or wiring should be addressed by a professional technician. Attempting to fix these issues without proper knowledge can be dangerous and may void your warranty.

Mechanical Failures

Motor or Drum Issues

    • If you encounter error codes indicating problems with the motor or drum, it’s best to consult a professional. These components are integral to the washing machine’s function and can be costly to repair if damaged further.

Strange Noises or Vibrations:

    • Unusual sounds or excessive vibrations often accompany error codes related to mechanical failures. A professional can diagnose the root cause and recommend the best solution.

Benefits of Professional Repair

Expert Diagnosis

    • Professionals have the tools and expertise to accurately diagnose the issue, saving you time and effort.

Warranty Protection:

  • If your washing machine is still under warranty, professional repairs are often covered, protecting you from additional costs.

Long-term Solutions

  • A professional repair ensures that the problem is fixed correctly the first time, reducing the likelihood of future issues.

While troubleshooting Washing Machine Error Codes can often solve the problem, knowing when to seek professional help is crucial for the longevity of your appliance. If you’re in doubt, don’t hesitate to contact us at 0508700774 for expert assistance.

Preventing Washing Machine Errors

Prevention is always better than cure, and the same applies to washing machine maintenance. By taking a few proactive steps, you can reduce the likelihood of encountering Washing Machine Error Codes and keep your appliance running smoothly for years to come.

Regular Maintenance Tips

Clean the Drum and Door Seal

  • Regularly clean the drum and door seal to prevent the buildup of dirt, mold, and detergent residue. This can help avoid error codes related to drainage and water flow.

Inspect and Clean Filters

  • Check the machine’s filters, including the lint filter and water inlet filter, for clogs and clean them periodically to ensure optimal performance.

Balance the Load

  • Always load your washing machine evenly and avoid overloading. This can prevent issues with load balance and reduce wear and tear on the drum and motor.

Use the Right Detergent

HE Detergent for High-Efficiency Machines

  • If you have a high-efficiency washing machine, use HE detergent to prevent excessive suds, which can lead to drainage issues and error codes.

Correct Dosage

  • Follow the manufacturer’s recommendations for detergent dosage to avoid buildup and potential malfunctions.

Schedule Regular Servicing

Professional Checkups

  • Schedule regular servicing with a professional technician to catch potential issues before they become major problems. This can also help maintain your machine’s warranty.

By following these preventive measures, you can minimize the occurrence of Washing Machine Error Codes and enjoy hassle-free laundry days. For any questions or assistance, feel free to reach out to us at 0508700774.

Conclusion

Understanding Washing Machine Error Codes is an invaluable skill for any homeowner. It not only helps you diagnose and troubleshoot issues quickly but also saves you time and money by reducing unnecessary service calls. By familiarizing yourself with these codes and knowing when to seek professional help, you can ensure your washing machine remains in top working condition.

Remember, regular maintenance and proper usage are key to preventing errors and prolonging the life of your appliance. Keep an eye out for common error codes, perform routine checks, and don’t hesitate to contact a professional when needed.

If you ever encounter a problem you can’t solve, or if you simply need advice on maintaining your washing machine, we’re here to help. Contact us at 0508700774 for expert guidance and support. Happy washing!

Read More
Washing Machine Door Seal

How to Replace a Washing Machine Door Seal

If you’ve noticed leaks or unpleasant odors coming from your washing machine, it might be time to replace the washing machine door seal. The door seal, also known as the gasket, is an essential component that ensures water stays inside the machine during washes. Over time, this rubber seal can become damaged or worn, leading to inefficiencies and potential water damage. This guide will walk you through the steps to replace your washing machine door seal efficiently.

Understanding the Importance of a Washing Machine Door Seal

A washing machine door seal is crucial in keeping your appliance functioning properly. It prevents water from leaking out during a wash cycle and stops mold and mildew from building up inside the machine. If you notice water pooling around your washing machine or detect a musty odor, it’s likely that the door seal is compromised.

A worn-out washing machine door seal can cause several issues:

  • Leaks: Water seeping out during wash cycles can damage flooring and create a slipping hazard.
  • Odors: A damaged seal can trap moisture, leading to mold and mildew growth, which causes unpleasant smells.
  • Inefficiency: Your washing machine may not perform optimally, resulting in longer drying times or ineffective cleaning.

Replacing a washing machine door seal might seem daunting, but it’s a manageable task with the right tools and guidance. Understanding why it’s important to replace it promptly can help you maintain the longevity and efficiency of your washing machine.

Signs That You Need to Replace Your Washing Machine Door Seal

Before diving into the replacement process, it’s important to identify whether your washing machine door seal truly needs replacing. Here are some common signs to look out for:

  1. Visible Damage: Inspect the seal for any visible cracks, tears, or deformations. These physical damages can lead to water leaks.
  2. Persistent Leaks: If you consistently find water around your washing machine, despite checking hoses and connections, the seal might be the culprit.
  3. Unpleasant Odors: A foul smell coming from your washing machine can indicate mold or mildew trapped in the door seal, often due to accumulated moisture.
  4. Inefficient Washing: Clothes might come out less clean if the seal isn’t properly holding water inside the drum, leading to inefficient washing cycles.
  5. Age of the Seal: Over time, seals naturally wear out. If your washing machine is several years old, it’s worth inspecting the seal as part of regular maintenance.

Recognizing these signs early can prevent further damage and help you decide when it’s time to replace your washing machine door seal. By addressing these issues promptly, you can ensure the continued efficiency of your washing machine.

Tools and Materials Needed for Replacing a Washing Machine Door Seal

Before starting the replacement process, gather the necessary tools and materials to ensure a smooth and efficient operation. Having everything ready will make the task quicker and less frustrating.

Essential Tools

  1. Screwdriver: Depending on your washing machine model, you may need a Phillips or flat-head screwdriver to remove screws holding the door seal in place.
  2. Needle-Nose Pliers: These are useful for removing and installing the retaining spring or wire that holds the seal.
  3. Lubricant: A small amount of dish soap or a specialized lubricant can help ease the new seal into place.
  4. Clean Cloth: For wiping away any dirt or mold from the area before installing the new seal.
  5. Bucket: To catch any excess water when you remove the old seal.

Replacement Materials

  • New Door Seal: Ensure you have the correct replacement seal for your washing machine model. Check the model number and purchase the seal from a reliable supplier.
  • Cleaning Solution: To clean the drum and surrounding areas before installing the new seal.

Step-by-Step Guide to Replacing the Washing Machine Door Seal

washing machine door seal

Once you have all your tools and materials ready, you can begin the process of replacing the washing machine door seal. Follow these steps to ensure a successful replacement:

Step 1: Turn Off the Power

Before starting any repair, ensure that your washing machine is turned off and unplugged from the power source. This is crucial for your safety during the process.

Step 2: Remove the Outer Seal Clamp

  • Open the washing machine door and locate the seal.
  • Use your needle-nose pliers to remove the clamp that holds the outer part of the seal. This is usually a spring or wire located around the door opening.
  • Carefully peel the seal away from the door, taking note of how it’s positioned.

Step 3: Access the Inner Seal

  • Depending on your machine, you may need to remove the front panel to access the inner seal. This might involve unscrewing parts of the machine to gain full access.
  • Once exposed, locate the inner retaining clamp or wire.

Step 4: Remove the Old Seal

  • Carefully remove the inner clamp using your pliers and gently pull the old seal away from the drum.
  • Note the alignment and fit of the old seal, as this will help when positioning the new one.

Step 5: Clean the Area

  • Before installing the new seal, clean the area around the drum and door opening. Use a cleaning solution to remove any mold, mildew, or detergent residue.
  • Dry the area with a clean cloth to ensure a good fit for the new seal.

Installing the New Washing Machine Door Seal

With the area cleaned and prepared, it’s time to install the new washing machine door seal. This part requires patience and precision to ensure a proper fit.

Step 6: Fit the New Seal

  • Begin by positioning the new seal around the drum, ensuring it fits snugly into the groove.
  • Align any holes or markings with those on the machine to ensure proper placement.
  • Gently work the seal into place, using a small amount of lubricant if necessary to ease it around the drum.

Step 7: Secure the Inner Seal

  • Once the seal is properly positioned, reattach the inner retaining clamp or wire.
  • Ensure the clamp is securely fastened to prevent the seal from coming loose during use.

Step 8: Reattach the Outer Seal

  • Fit the outer part of the seal around the door opening.
  • Secure it with the outer clamp, ensuring it’s tightly in place.

Step 9: Test the Seal

  • Close the washing machine door and plug the machine back in.
  • Run a short cycle without clothes to test for leaks. Observe the seal for any signs of water escaping.

Tips for Maintaining Your New Washing Machine Door Seal

To prolong the life of your new washing machine door seal and maintain the efficiency of your appliance, consider the following maintenance tips:

  1. Regular Cleaning: Wipe down the seal with a damp cloth after each use to remove moisture and prevent mold buildup.
  2. Leave the Door Open: Allow the washing machine door to remain slightly open when not in use to promote air circulation and reduce moisture retention.
  3. Use Appropriate Detergent: Use the recommended amount of detergent to prevent excessive residue that can lead to mold growth.
  4. Inspect Regularly: Periodically check the seal for any signs of wear or damage, addressing issues promptly to prevent leaks.
  5. Avoid Overloading: Overloading the washing machine can put extra pressure on the seal, leading to premature wear.

By following these tips, you can extend the life of your washing machine door seal and ensure your appliance runs smoothly for years to come.

When to Call a Professional

While replacing a washing machine door seal is generally a manageable task for most homeowners, there are times when calling a professional might be necessary:

  • Complex Models: If your washing machine model is particularly complex or unfamiliar, it might be best to seek professional help to avoid damaging the machine.
  • Persistent Issues: If leaks or odors persist after replacing the seal, a professional technician can diagnose and fix underlying issues.
  • Warranty Concerns: If your washing machine is still under warranty, professional servicing might be required to maintain coverage.

For professional assistance, feel free to contact us at 0545354777. Our experienced technicians can help ensure your washing machine operates efficiently and effectively.

Conclusion

Replacing a washing machine door seal is a straightforward process that can significantly improve the performance and lifespan of your appliance. By following this guide and taking the time to perform regular maintenance, you can prevent leaks, odors, and inefficiencies in your washing machine. Remember, if you encounter any difficulties or persistent issues, professional help is just a phone call away at 0545354777. Keep your washing machine in top condition and enjoy cleaner clothes with a properly sealed door.

Read More
  • 1
  • 2
error: Content is protected !!